
The Perch build is officially going the distance. Assembling the undercarriage was more interesting than I anticipated, so I’ll dedicate this post to that process and show off the finished piece in my next post.
Turning the legs was relatively uneventful. I still have a ways to go before reliably achieving a clean, sand-free finish with the skew tool, but I felt more confident and improved with each leg. Cutting the v-grooves gave me trouble at first. After some frustration, I consulted The Chairmakers Notebook and it turns out my recollection of the technique was completely wrong. Once I corrected my technique, it was so simple that I’m mad I didn’t stop to check sooner.
The real fun began when it came time to drill the mortises. Peter Galbert has methods to make this process foolproof, but instead I decided to wing it and see what happens. Working with wood offers us some degree of flexibility, and I prefer to keep things simple1 whenever I can.
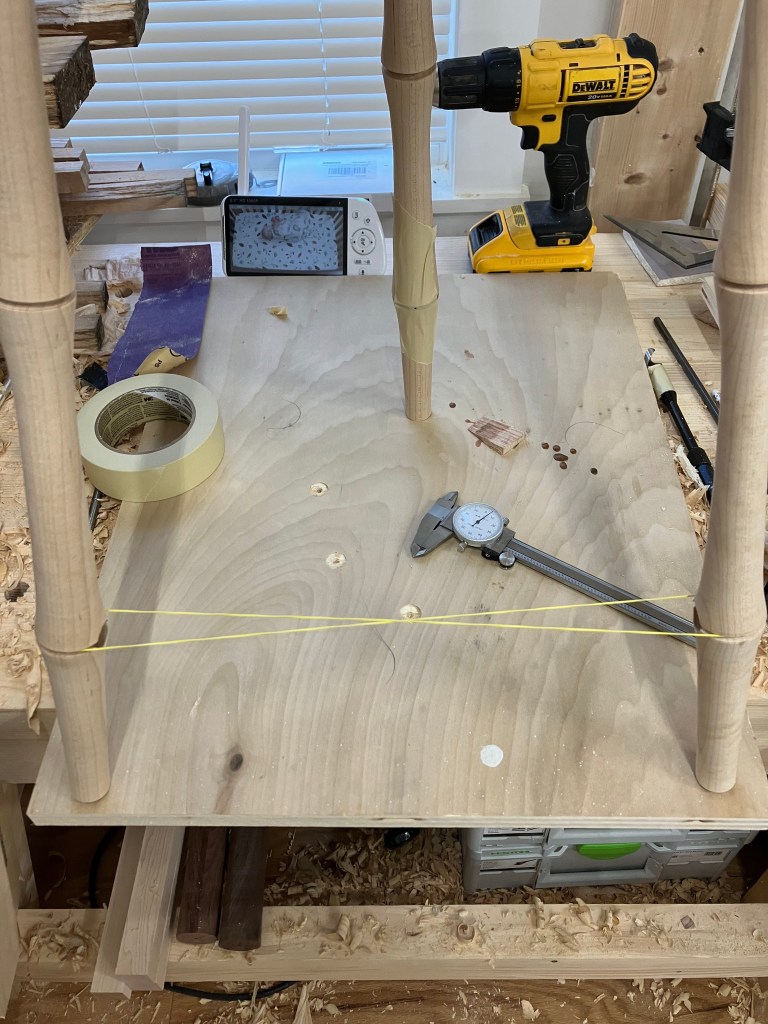
For the rear leg mortises, I held the drill bit against the opposite leg as a reference and adjusted2 the leg I was drilling until it was square with the bit. The front leg was easier—I used a rubber band to find the center of the back legs and drilled from that reference point. I started the holes using a spade bit with a long spur, then switched to a WoodOwl OverDrive bit. The WoodOwl bits (both the OverDrive and the Tri-Cut3) are my go-to, but the short spur on the OverDrive bit made it hard to position in the v-groove. The spade bit worked better for reference, but I was worried the long spur would break through the other side of the leg on the 1-inch deep mortise.

I don’t usually get stressed out during glue-ups, but chairs might be the exception. Since the joints are round, you have to pay careful attention to make sure the orientation is correct before driving the tenon into the mortise. Once these joints are set, they’re not coming apart. In some cases you can’t even adjust them. I did use yellow glue while most chair makers seem to prefer hide glue. After this glue-up I can see the appeal—longer open time and a bit more ‘slip’ in the joint before it sets would have been helpful. My yellow glue joints locked up instantly, making adjustments impossible.
This brings us to the tension in the undercarriage. The primary means of adding tension to a chair’s undercarriage is by adding 1/16 – 1/8″ to the stretchers to “push” the legs out a bit. There’s great debate on whether or not this is actually desirable, but in my opinion the real question is whether or not it’s avoidable. I added about 1/8″ to my stretchers. Realistically, I can’t guarantee that my mortises were exactly 1″ deep. I’d rather have the stretcher push the legs out slightly, with the tension working to keep that joint tight, than have a stretcher that doesn’t seat all the way in the mortise or a leg that is trying to pull the joint apart.
Of course, not all tension is good tension. I forgot to make a mark on the rear stretcher to ensure that the mortise was at the correct angle to receive the front stretcher so I had to eyeball it. The mortise ended up at too shallow of an angle which pushed the front leg too far forward (like the left side of the very rough sketch below). Although I managed to wrestle everything into place, this is a situation where tension could have worked in my favor. If I had erred in the other direction (like the right side of the sketch) then any tension would have worked to pull the chair assemble tighter. Next time I’ll remember to make a mark for the correct angle, but I’ll also seat the stretcher at a slightly higher angle to let the tension work in my favor. In theory this bad tension could cause a problem some day, but I’m not overly worried about it.

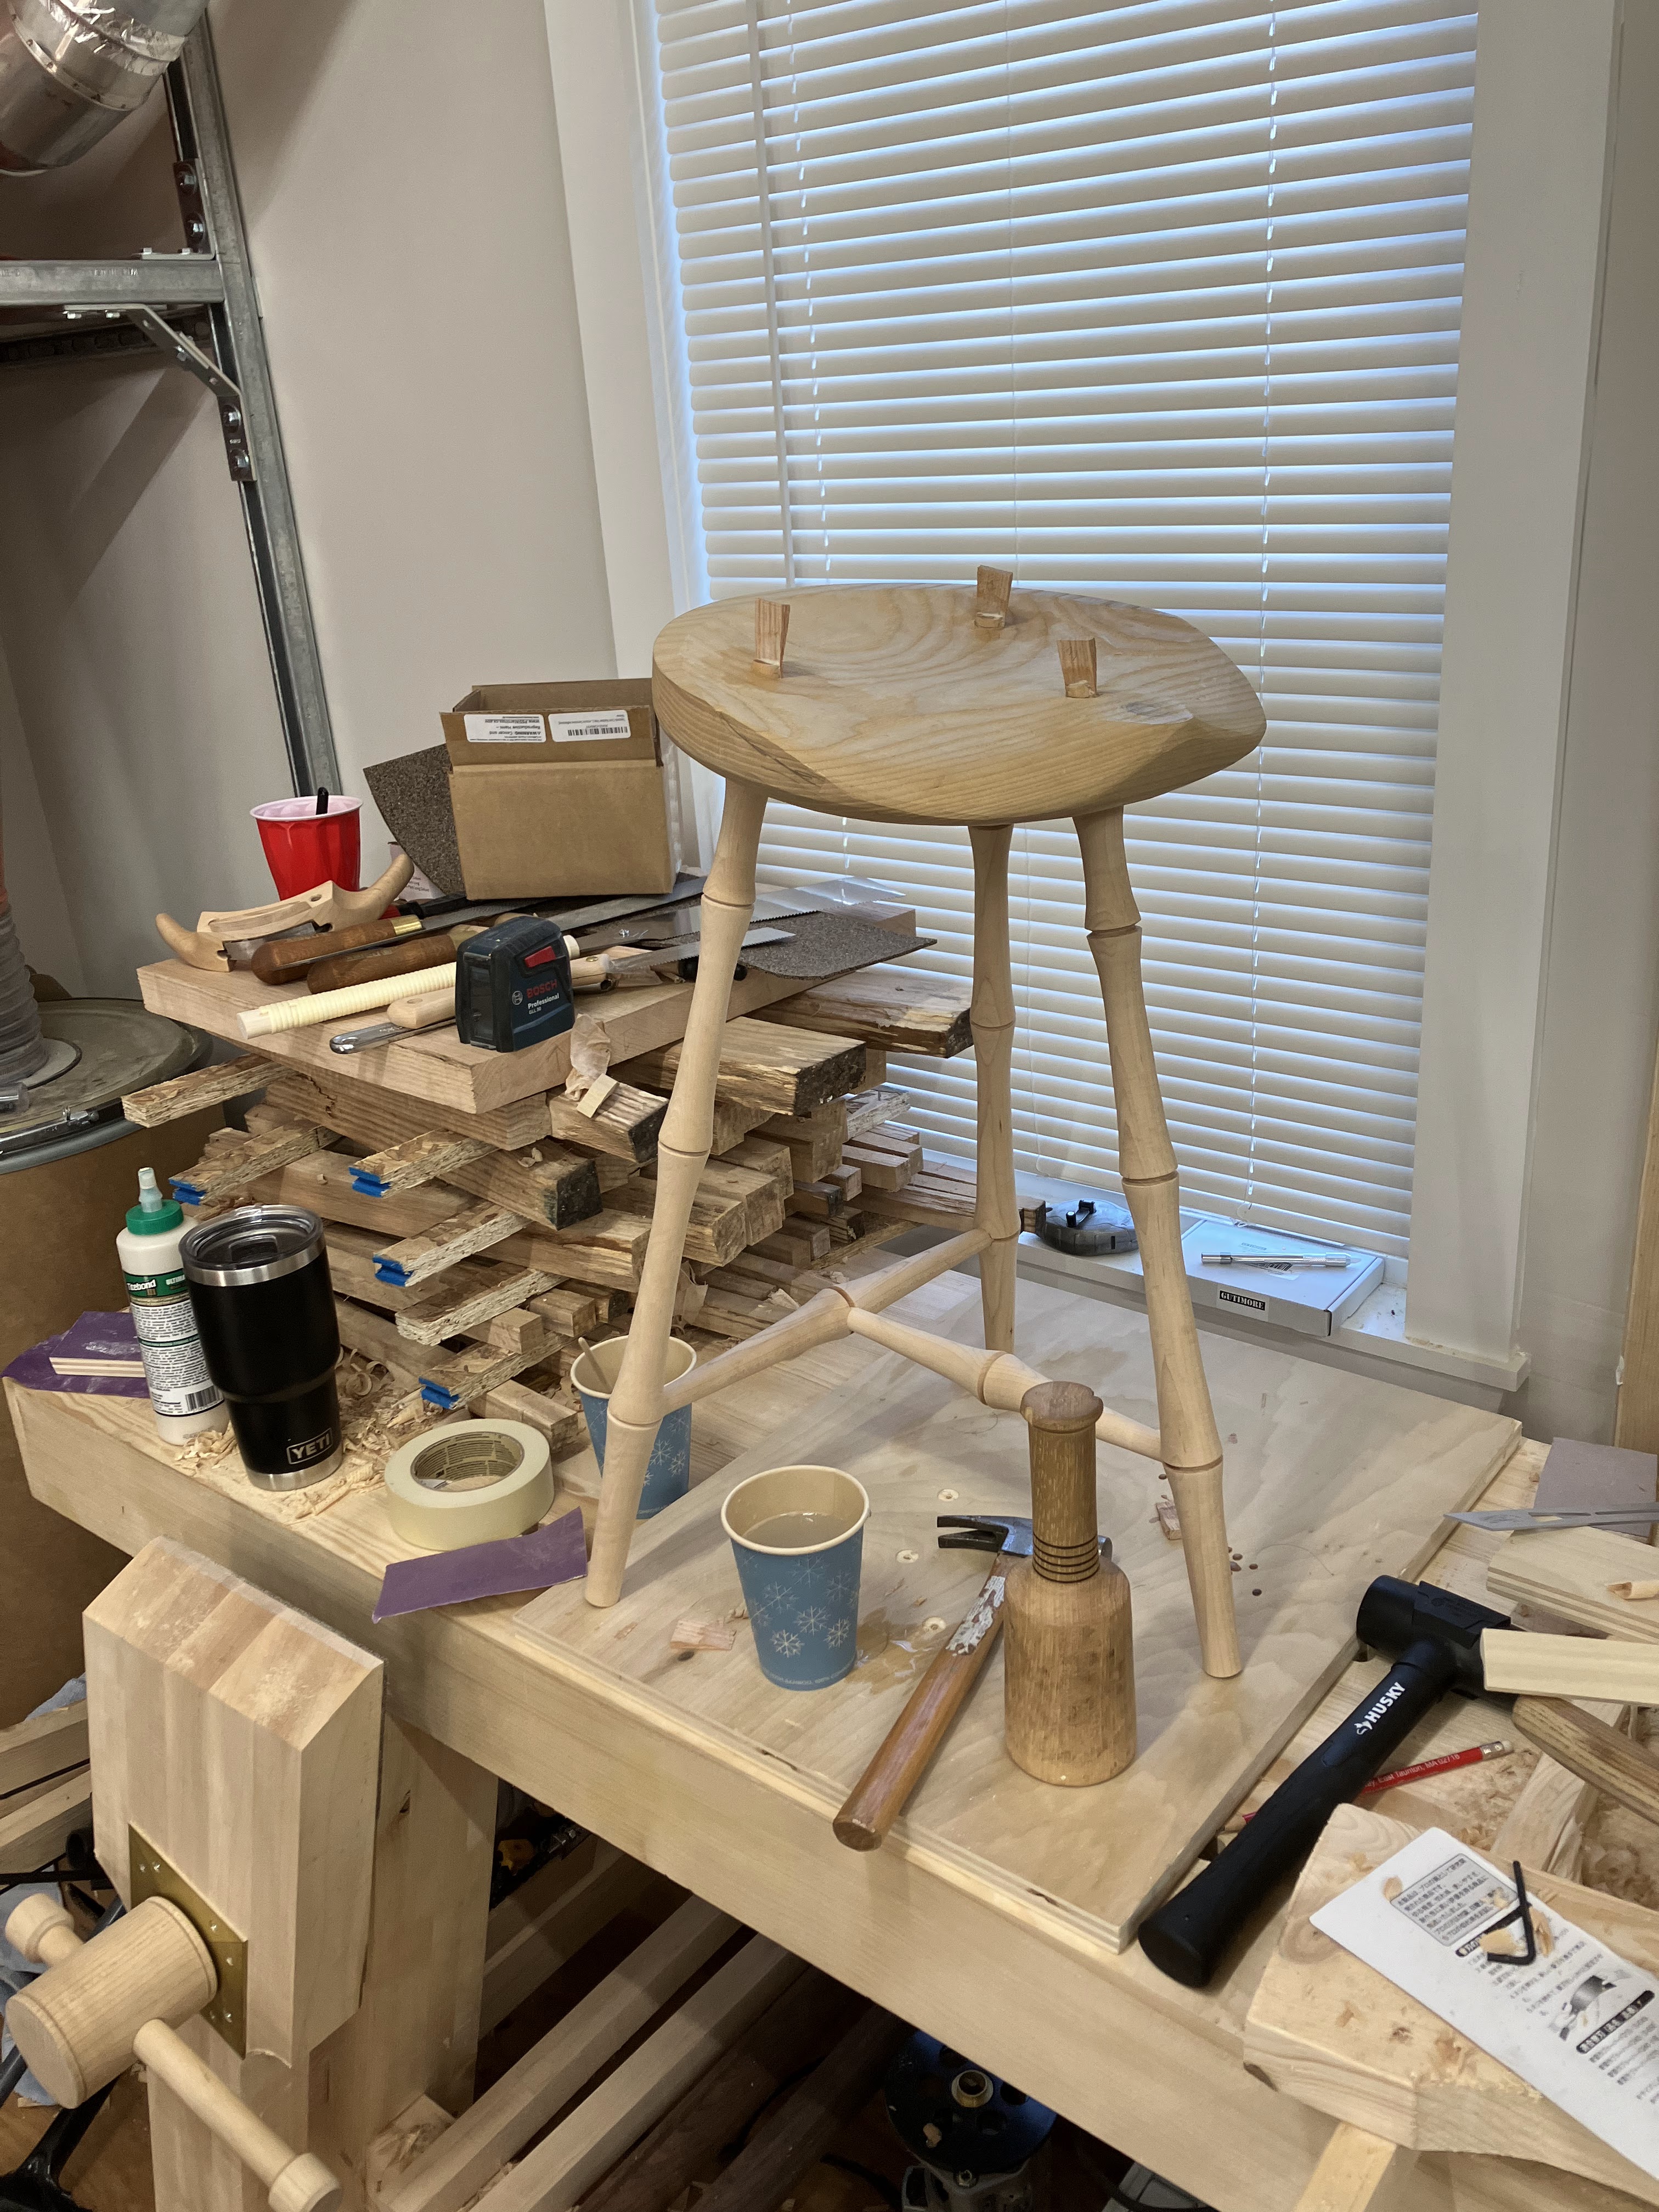
I don’t have any strong opinions on the wedges yet—I’m still experimenting with different angles and wood types. This time, I used oak, but I’d like to try hickory next. I had to open up the kerfs slightly with a chisel to get the wedges started, but after that, they went in smoothly. The assembled Perch is below. I’m excited with how it’s coming together and looking forward to the finish.
- Peter’s method is incredibly simple but it requires a clean bench and mirrors, neither of which I have. ↩︎
- I know that this will slightly alter the angle of the mortise but it didn’t cause any issues with the alignment of the rear legs. ↩︎
- I used the Tri-Cut to bore the clearance holes in the seat. The screw-tip is great for that purpose but makes the bits useless on blind mortises in the legs. ↩︎

Leave a comment