
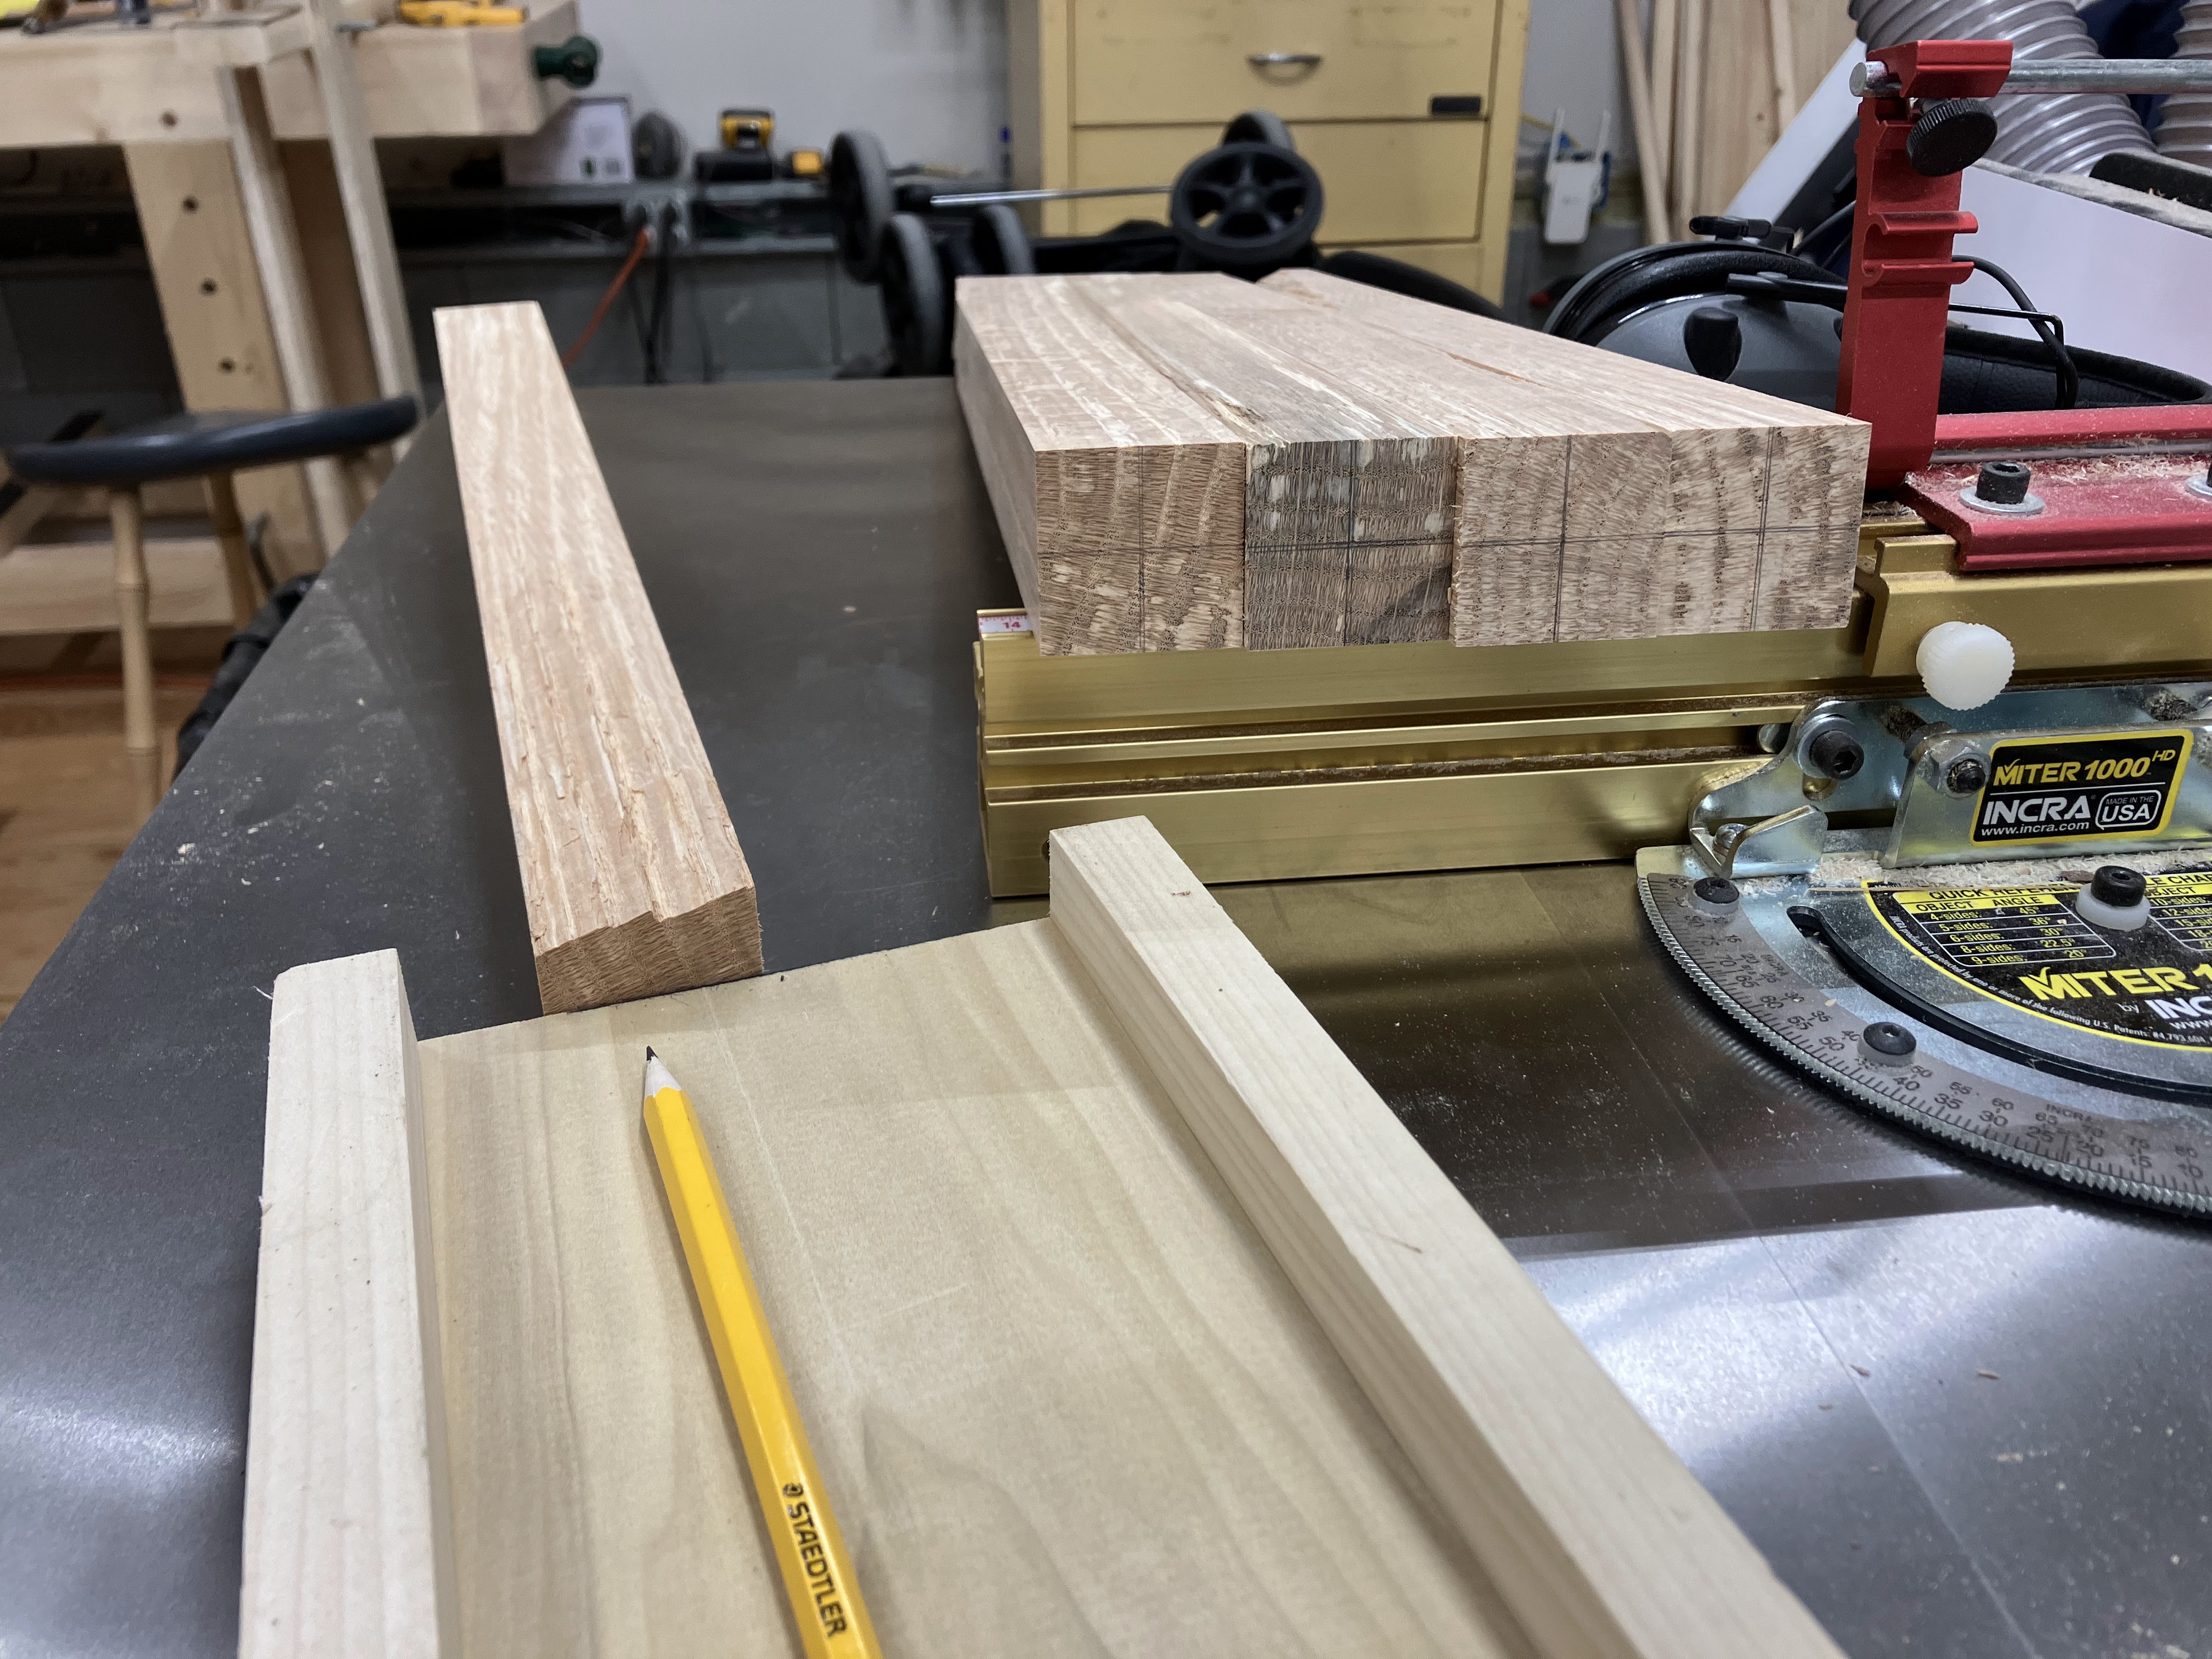
The Irish stick chair is moving along. Putting the details aside, the base is nothing more than some sticks mortised into a plank. Not overly complex stuff, although it took some creativity to deal with the stock at times. As you can see in the picture below, not all of the bolts for the legs maintained a consistent thickness along their entire length. This limited how much machining I could do safely, so most of the work from here on out was done by hand.
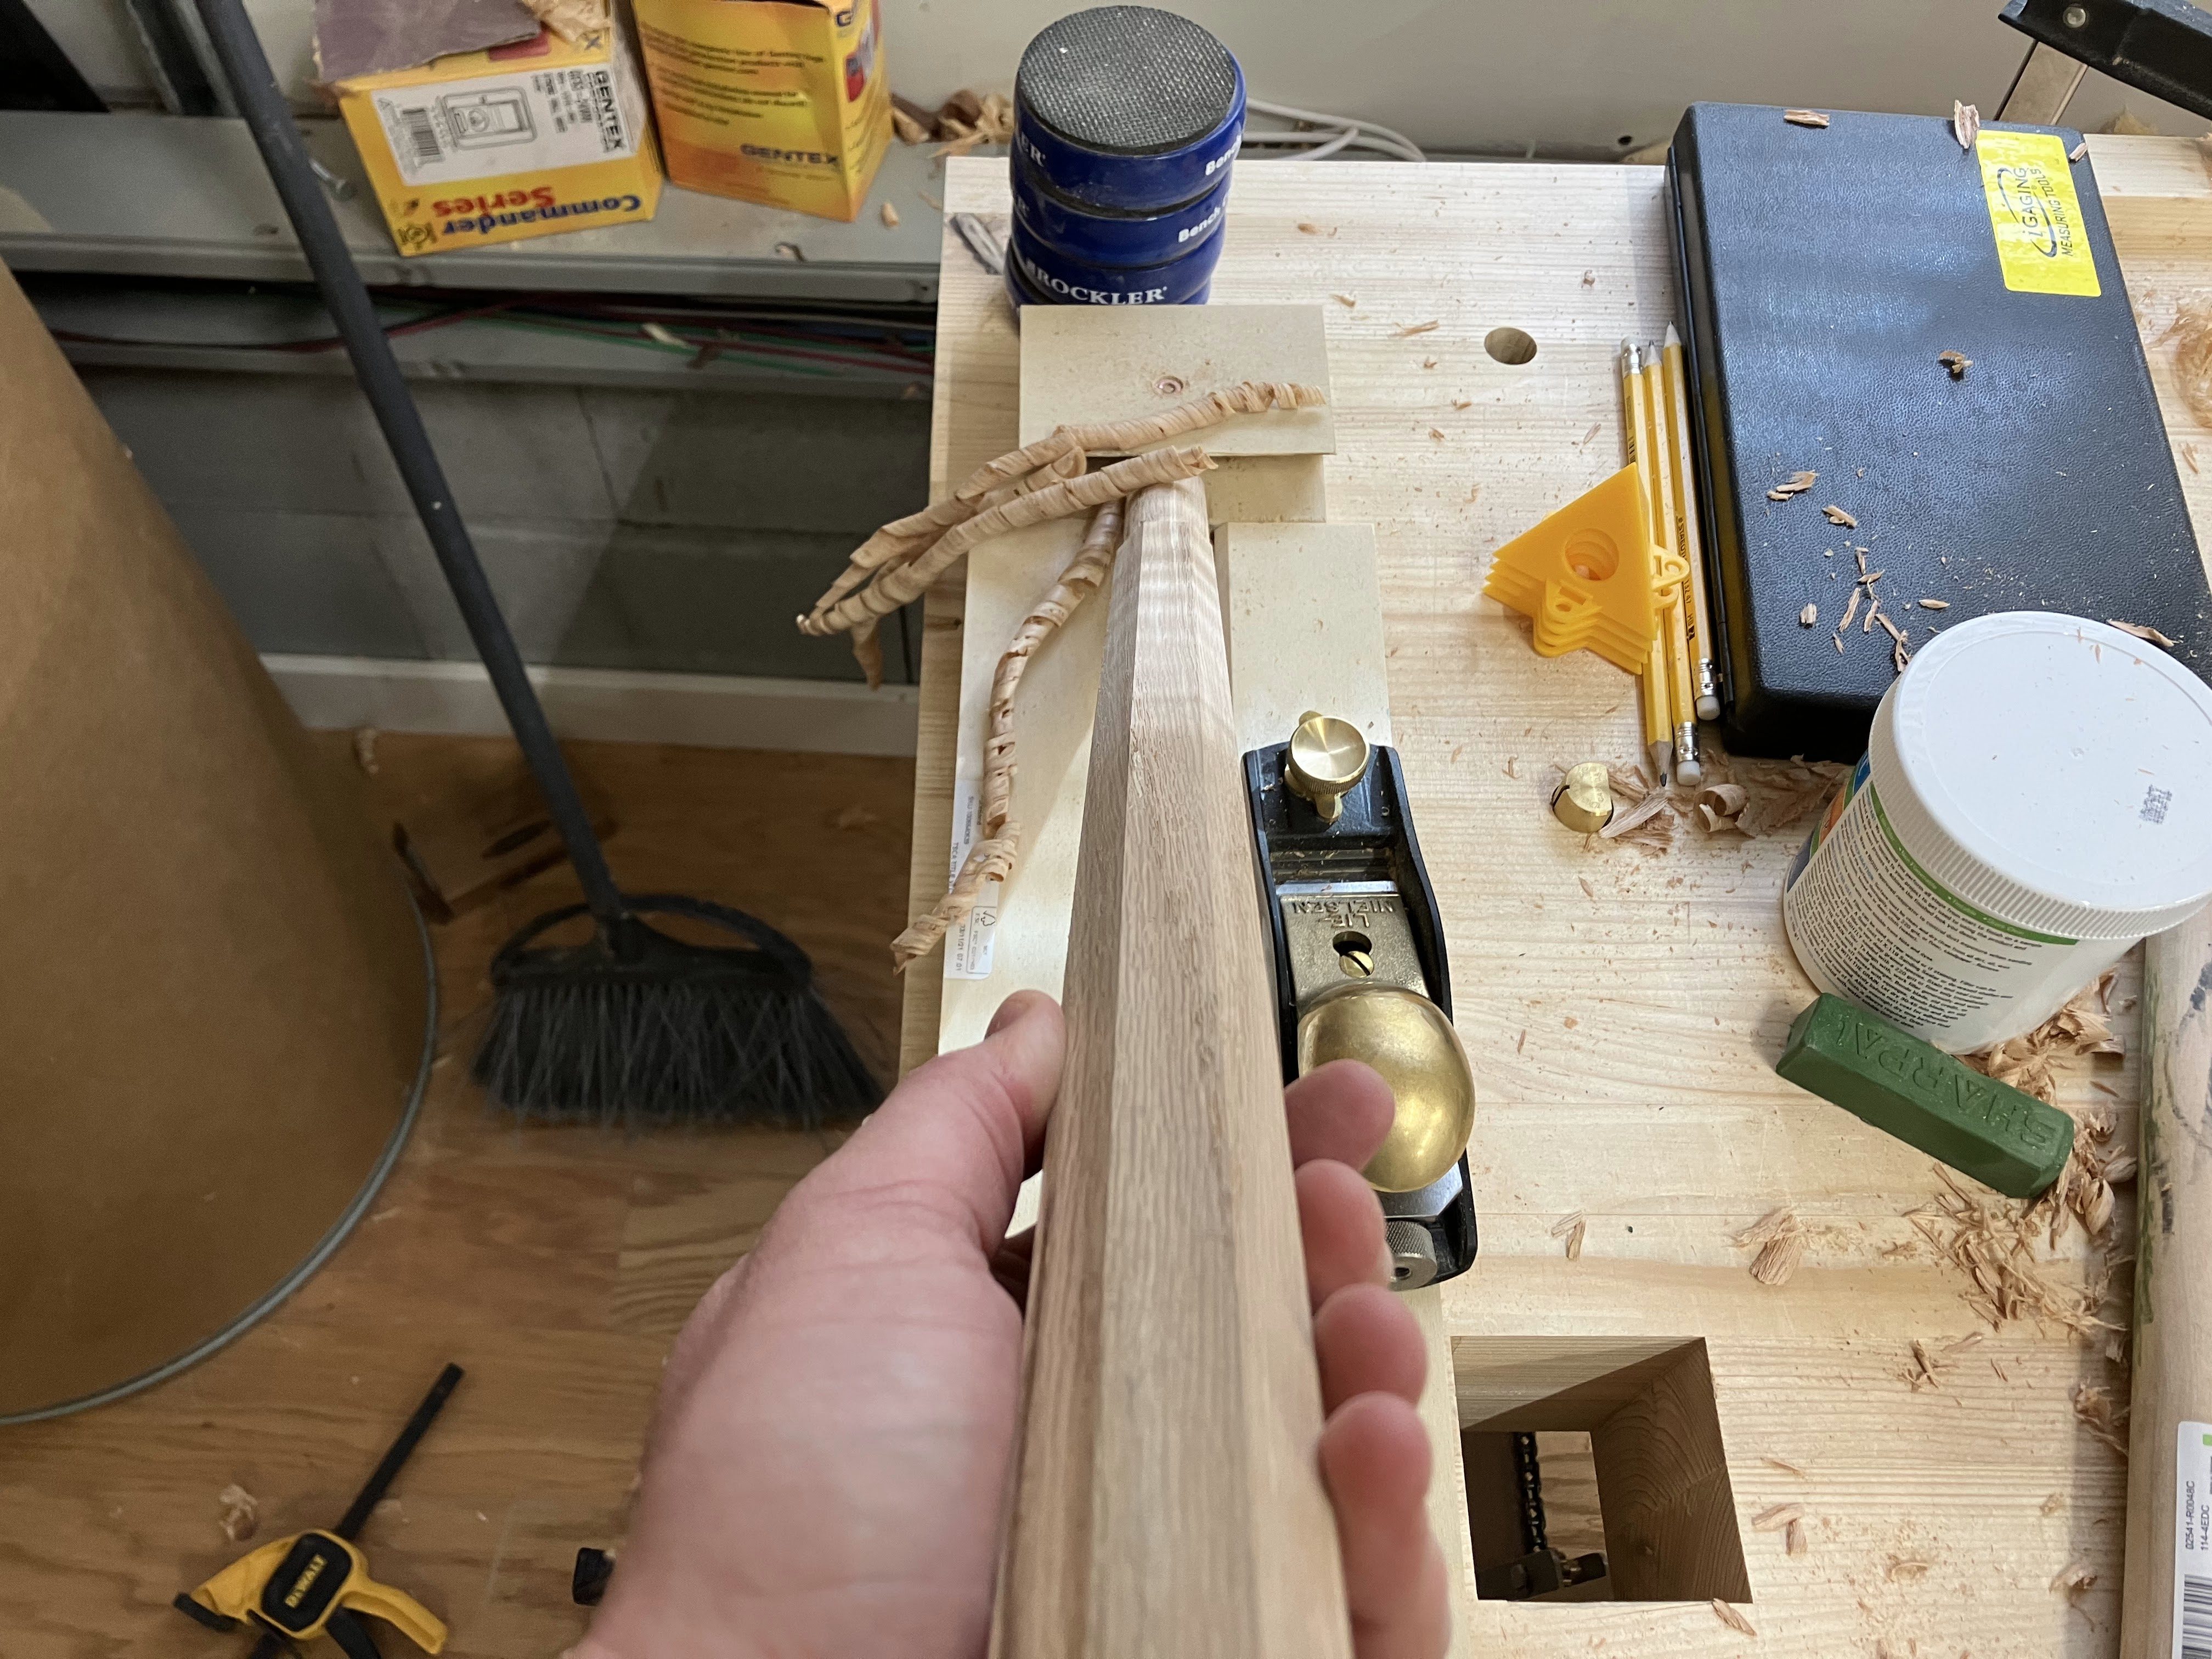
Before tapering the legs, I marked their centers. This is easiest to do when the stock is still square, and it’s crucial to have the centers marked since I’m going to turn the tenons. To act as a guide while tapering, I scored the end of each leg with a 1″ drill bit. This makes it easy to see my progress and know exactly when to stop.
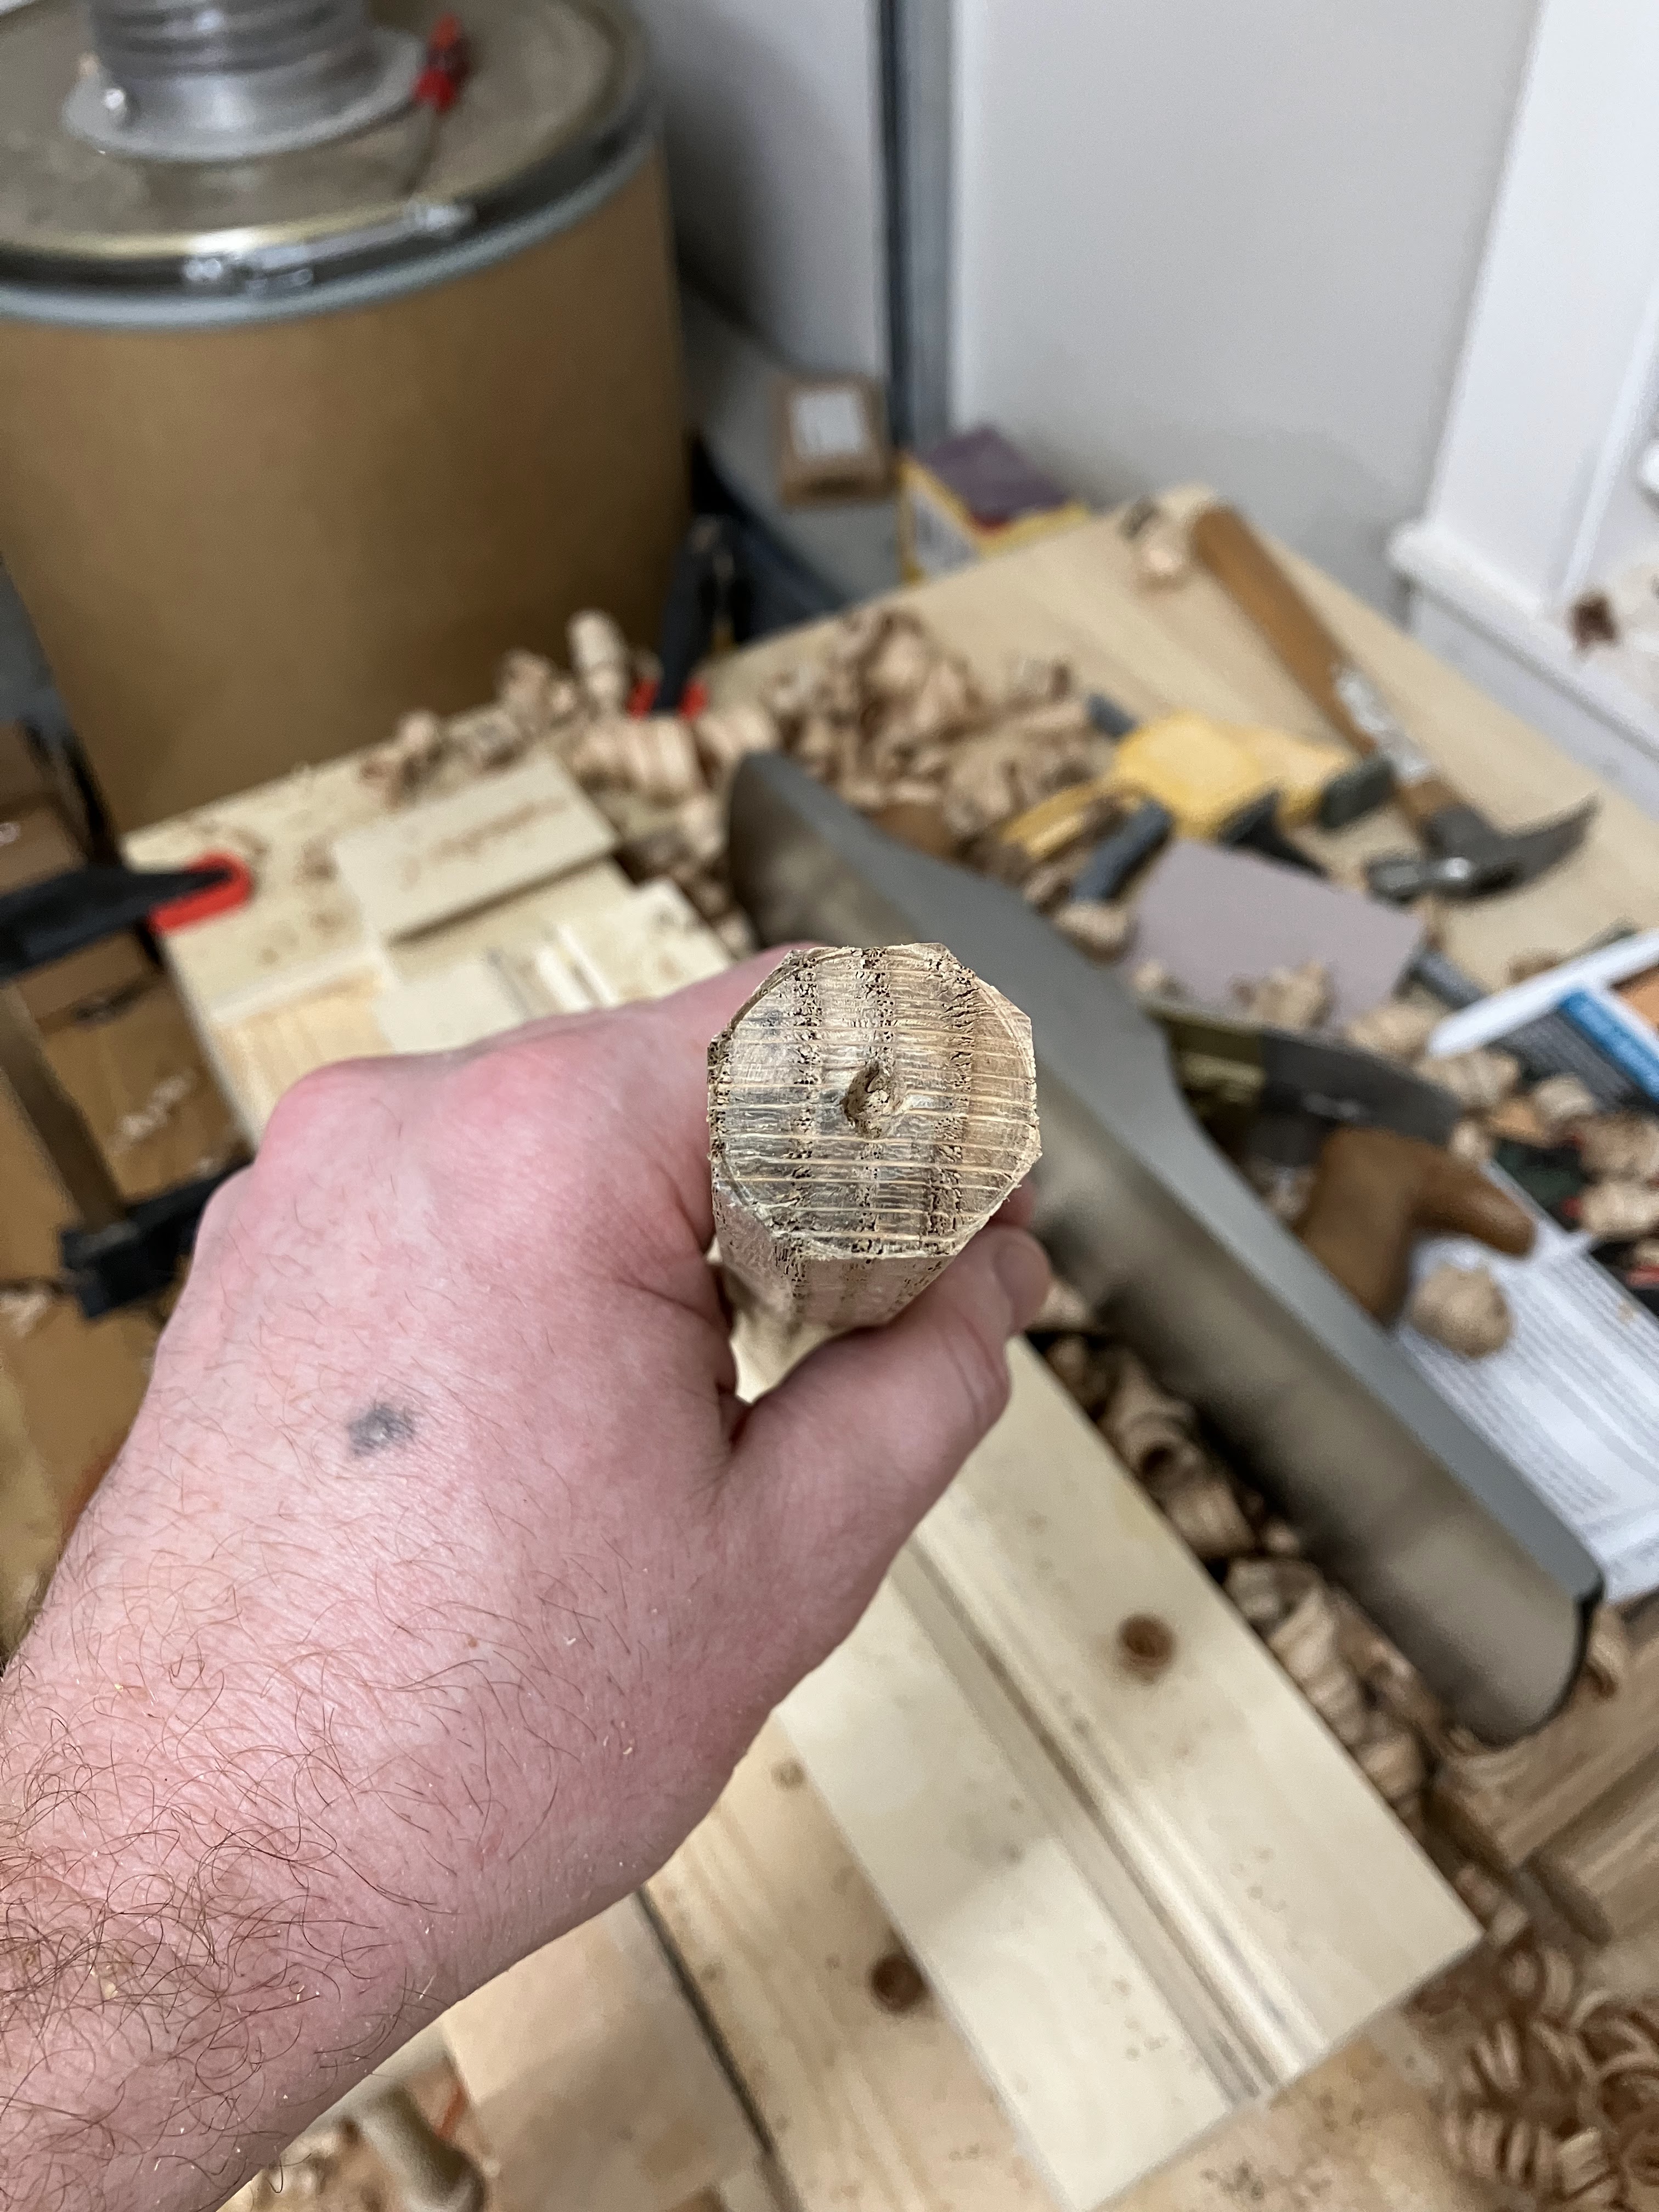
I used the same simple jig to shape each leg into an octagon and add the taper. In the picture below, I have the leg propped up against the stop on the second level, which puts it at the right angle for tapering. Underneath the leg you can see a v-groove. When the stock was still square, I placed it in the v-groove and knocked the edges off to form an octagon.
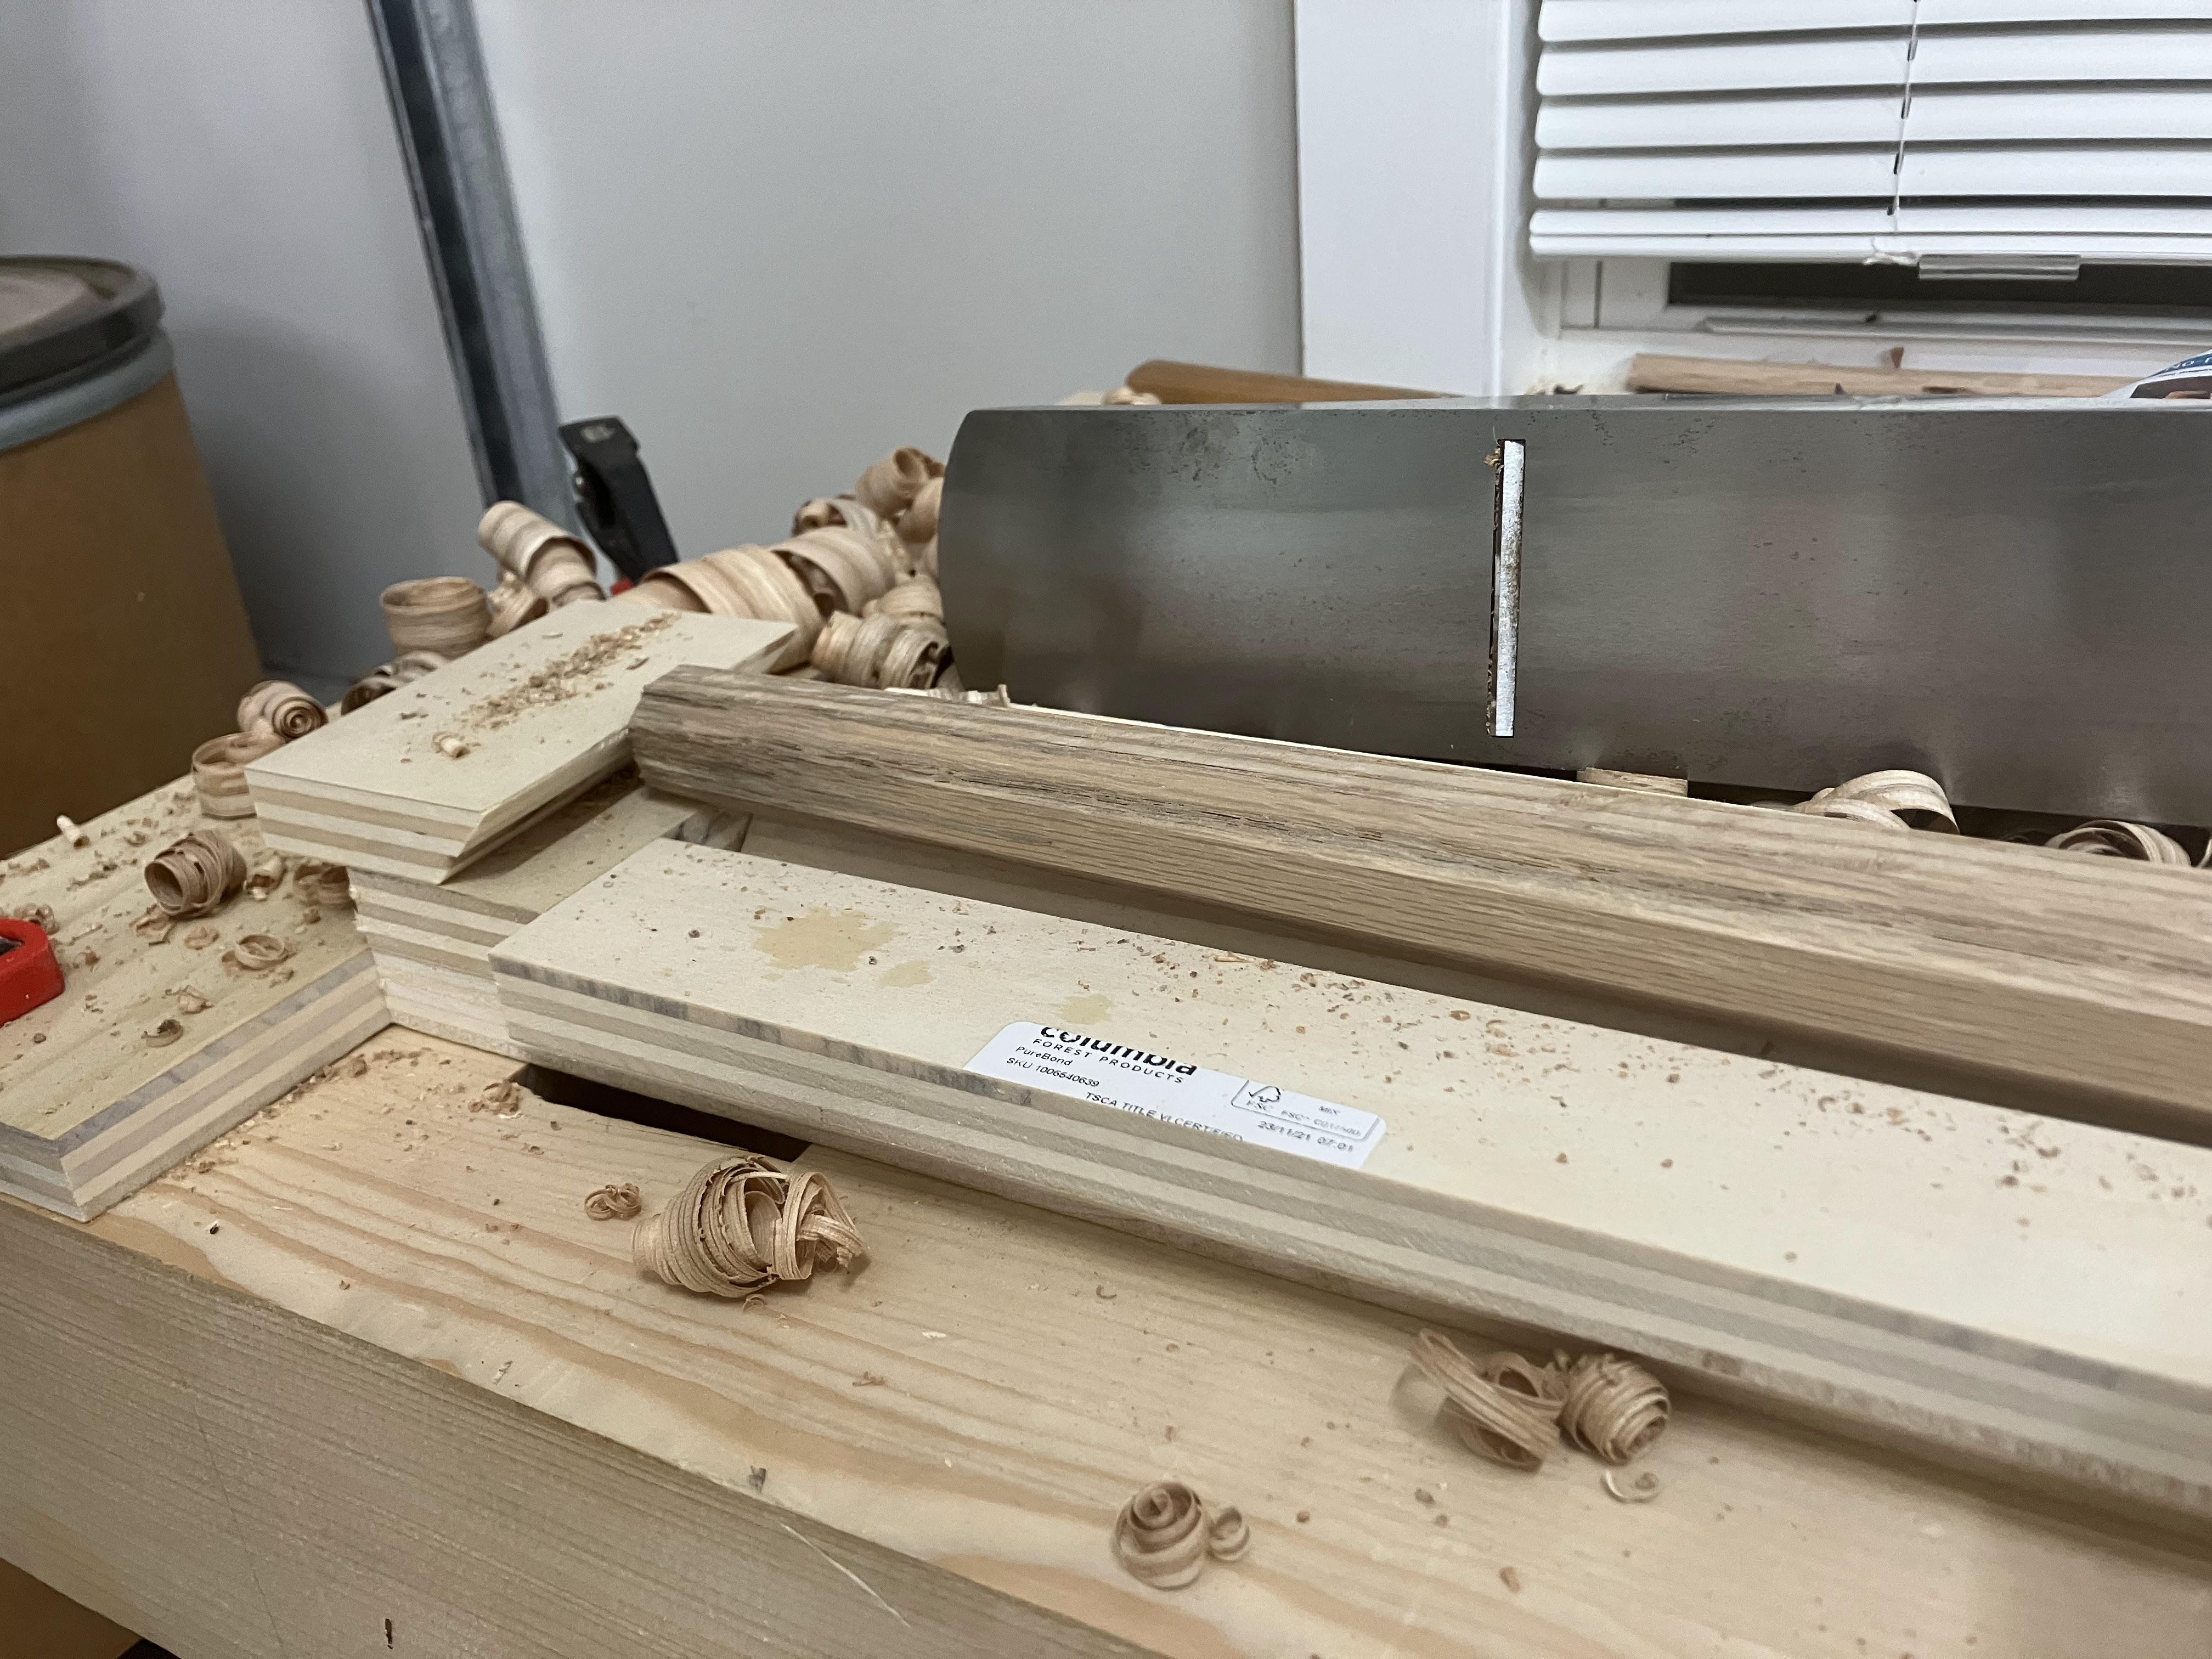
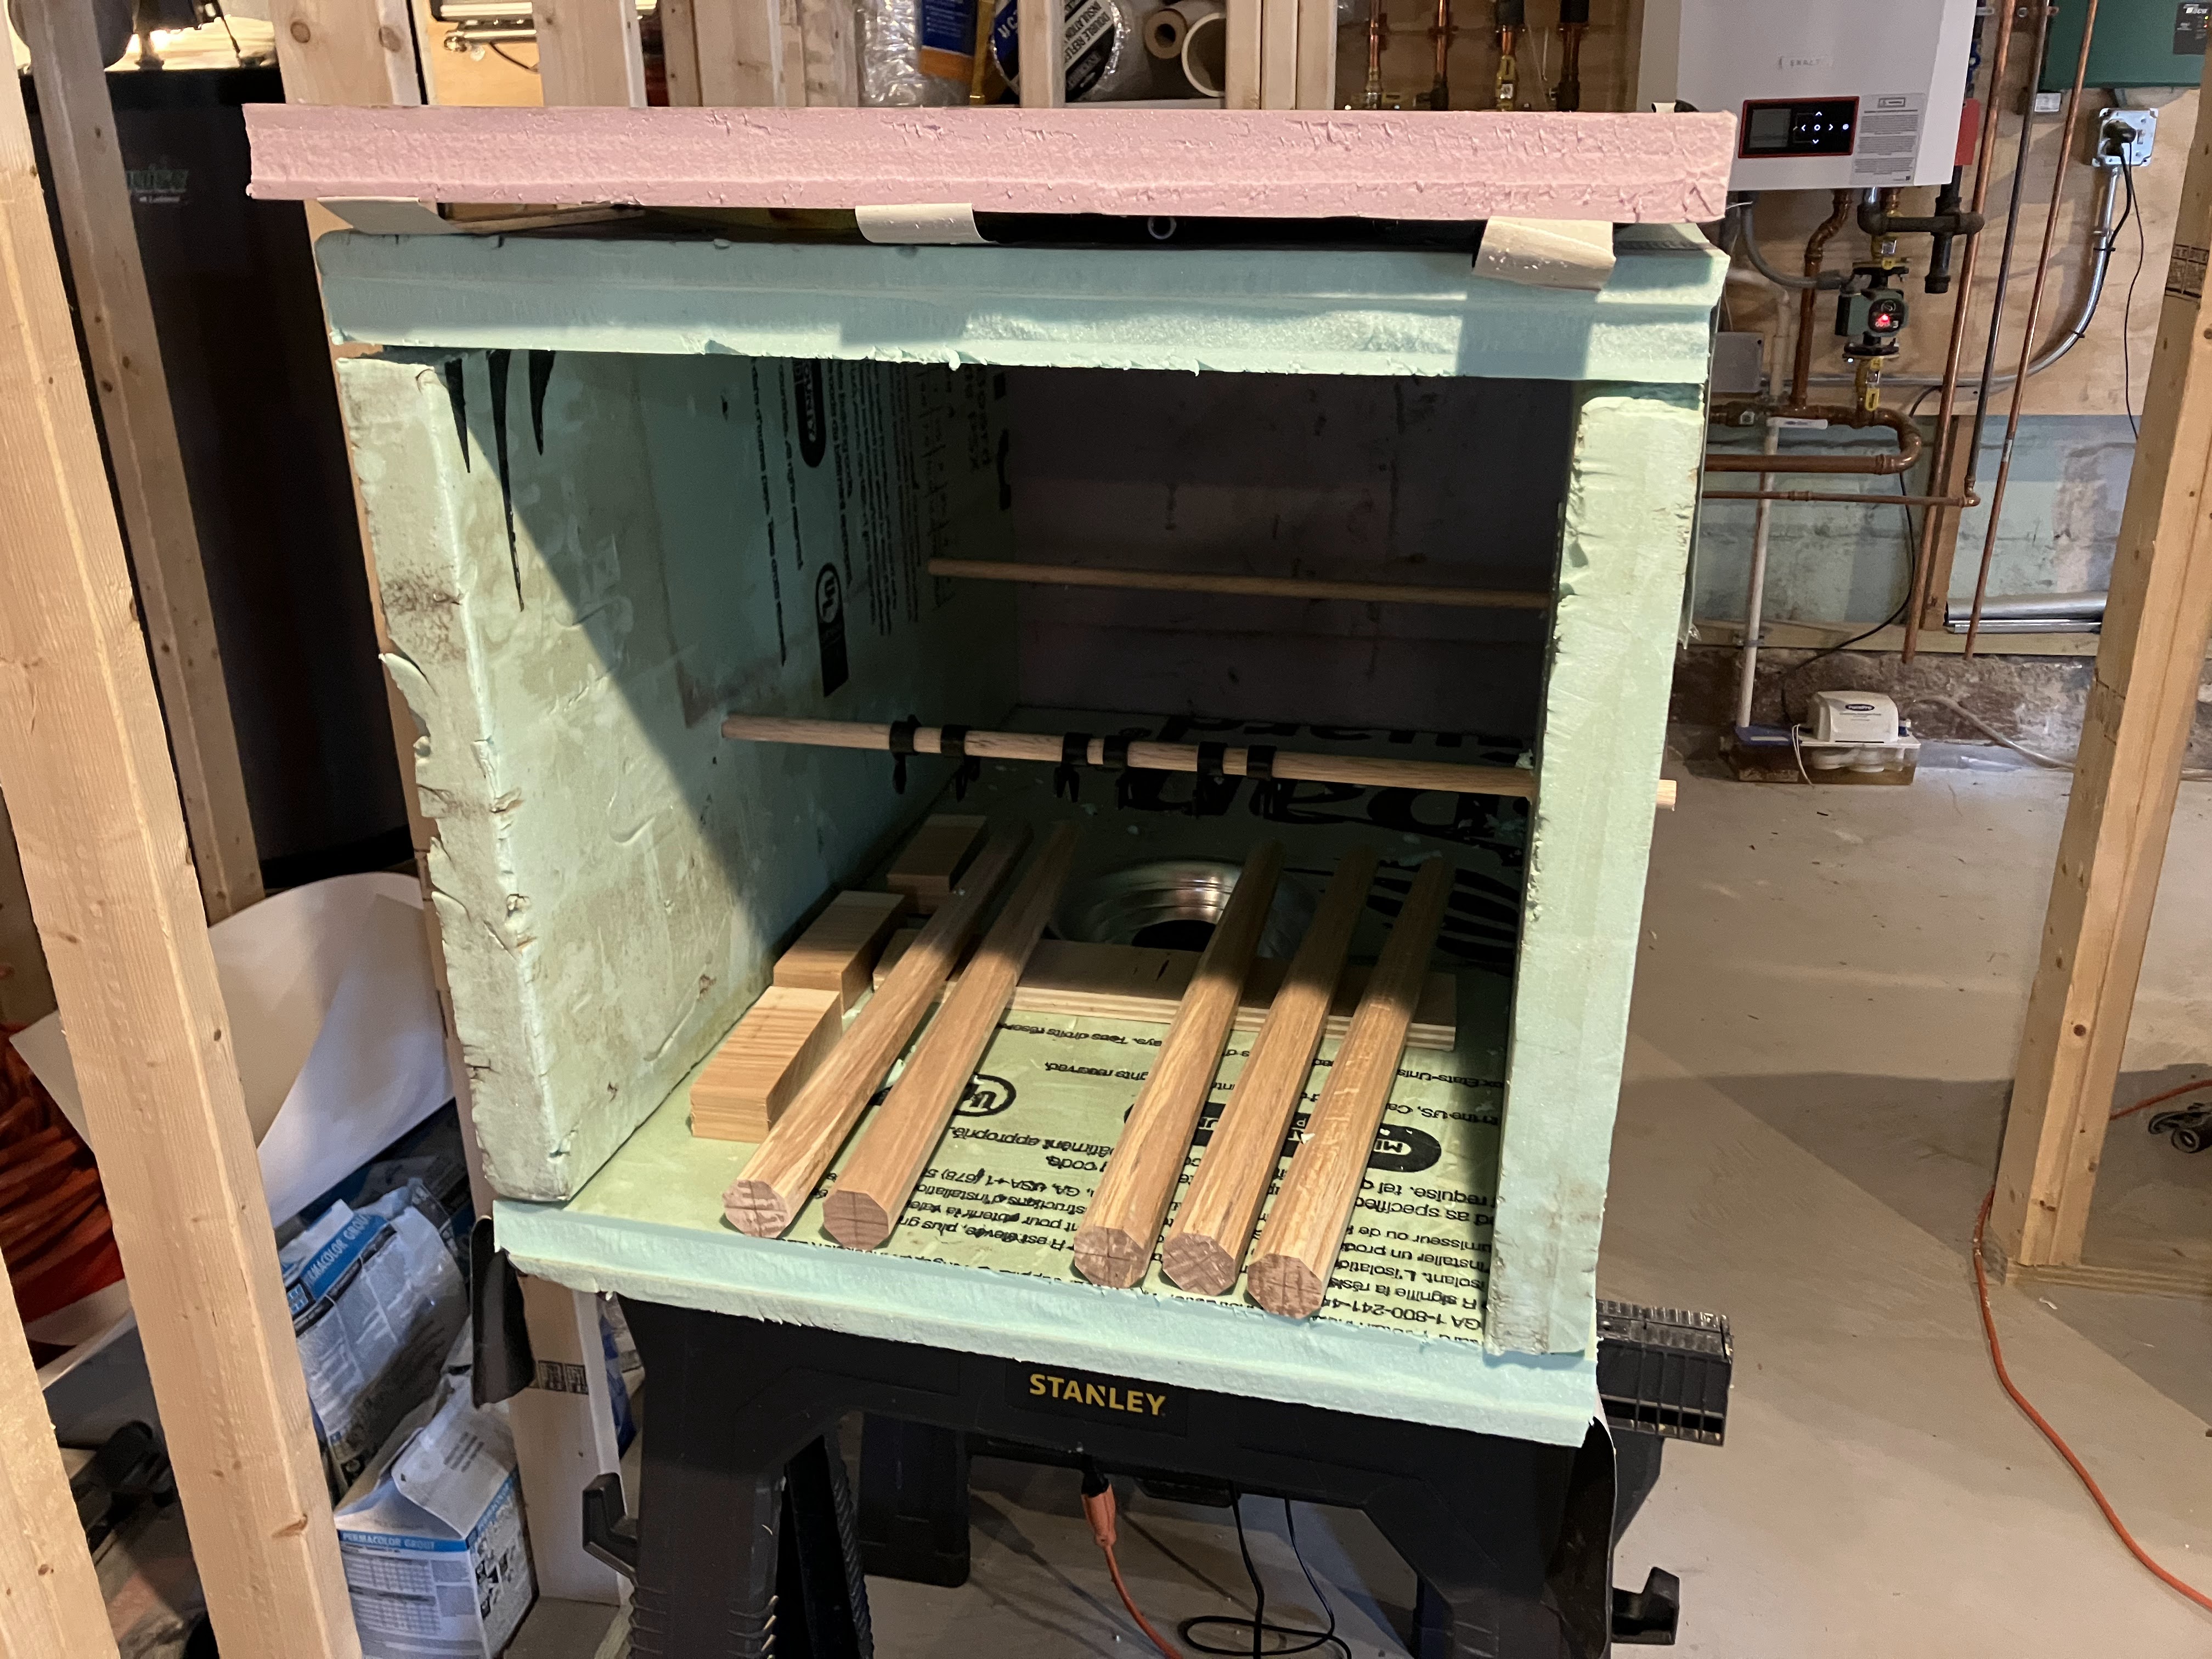
Then it was off to the kiln to dry out the tenons. Currently, my kiln is just some foam boards duct taped together, with a reptile heat lamp inside. There’s a thermostat, but it never quite reaches the setpoint. Someday, I’ll convert a shelf in my utility closet into a more permanent kiln with an adequately sized heating element, but this setup works for now. You’ll also notice that I have a few pieces of hickory off to the left. Those will be used for wedges.
While the legs were drying out, I moved on to the seat. The stock wasn’t very thick, so I tried to remove as little material as possible while dressing it. You can see there’s still a rough patch near the front of the seat. That area will be removed when I scoop out the seat, so there’s no reason to make the seat any thinner to clean it up. Aside from pointing that out, this picture is mostly to show off my trammel points. I know it’s easy to make your own, but I love this pair and highly recommend them.

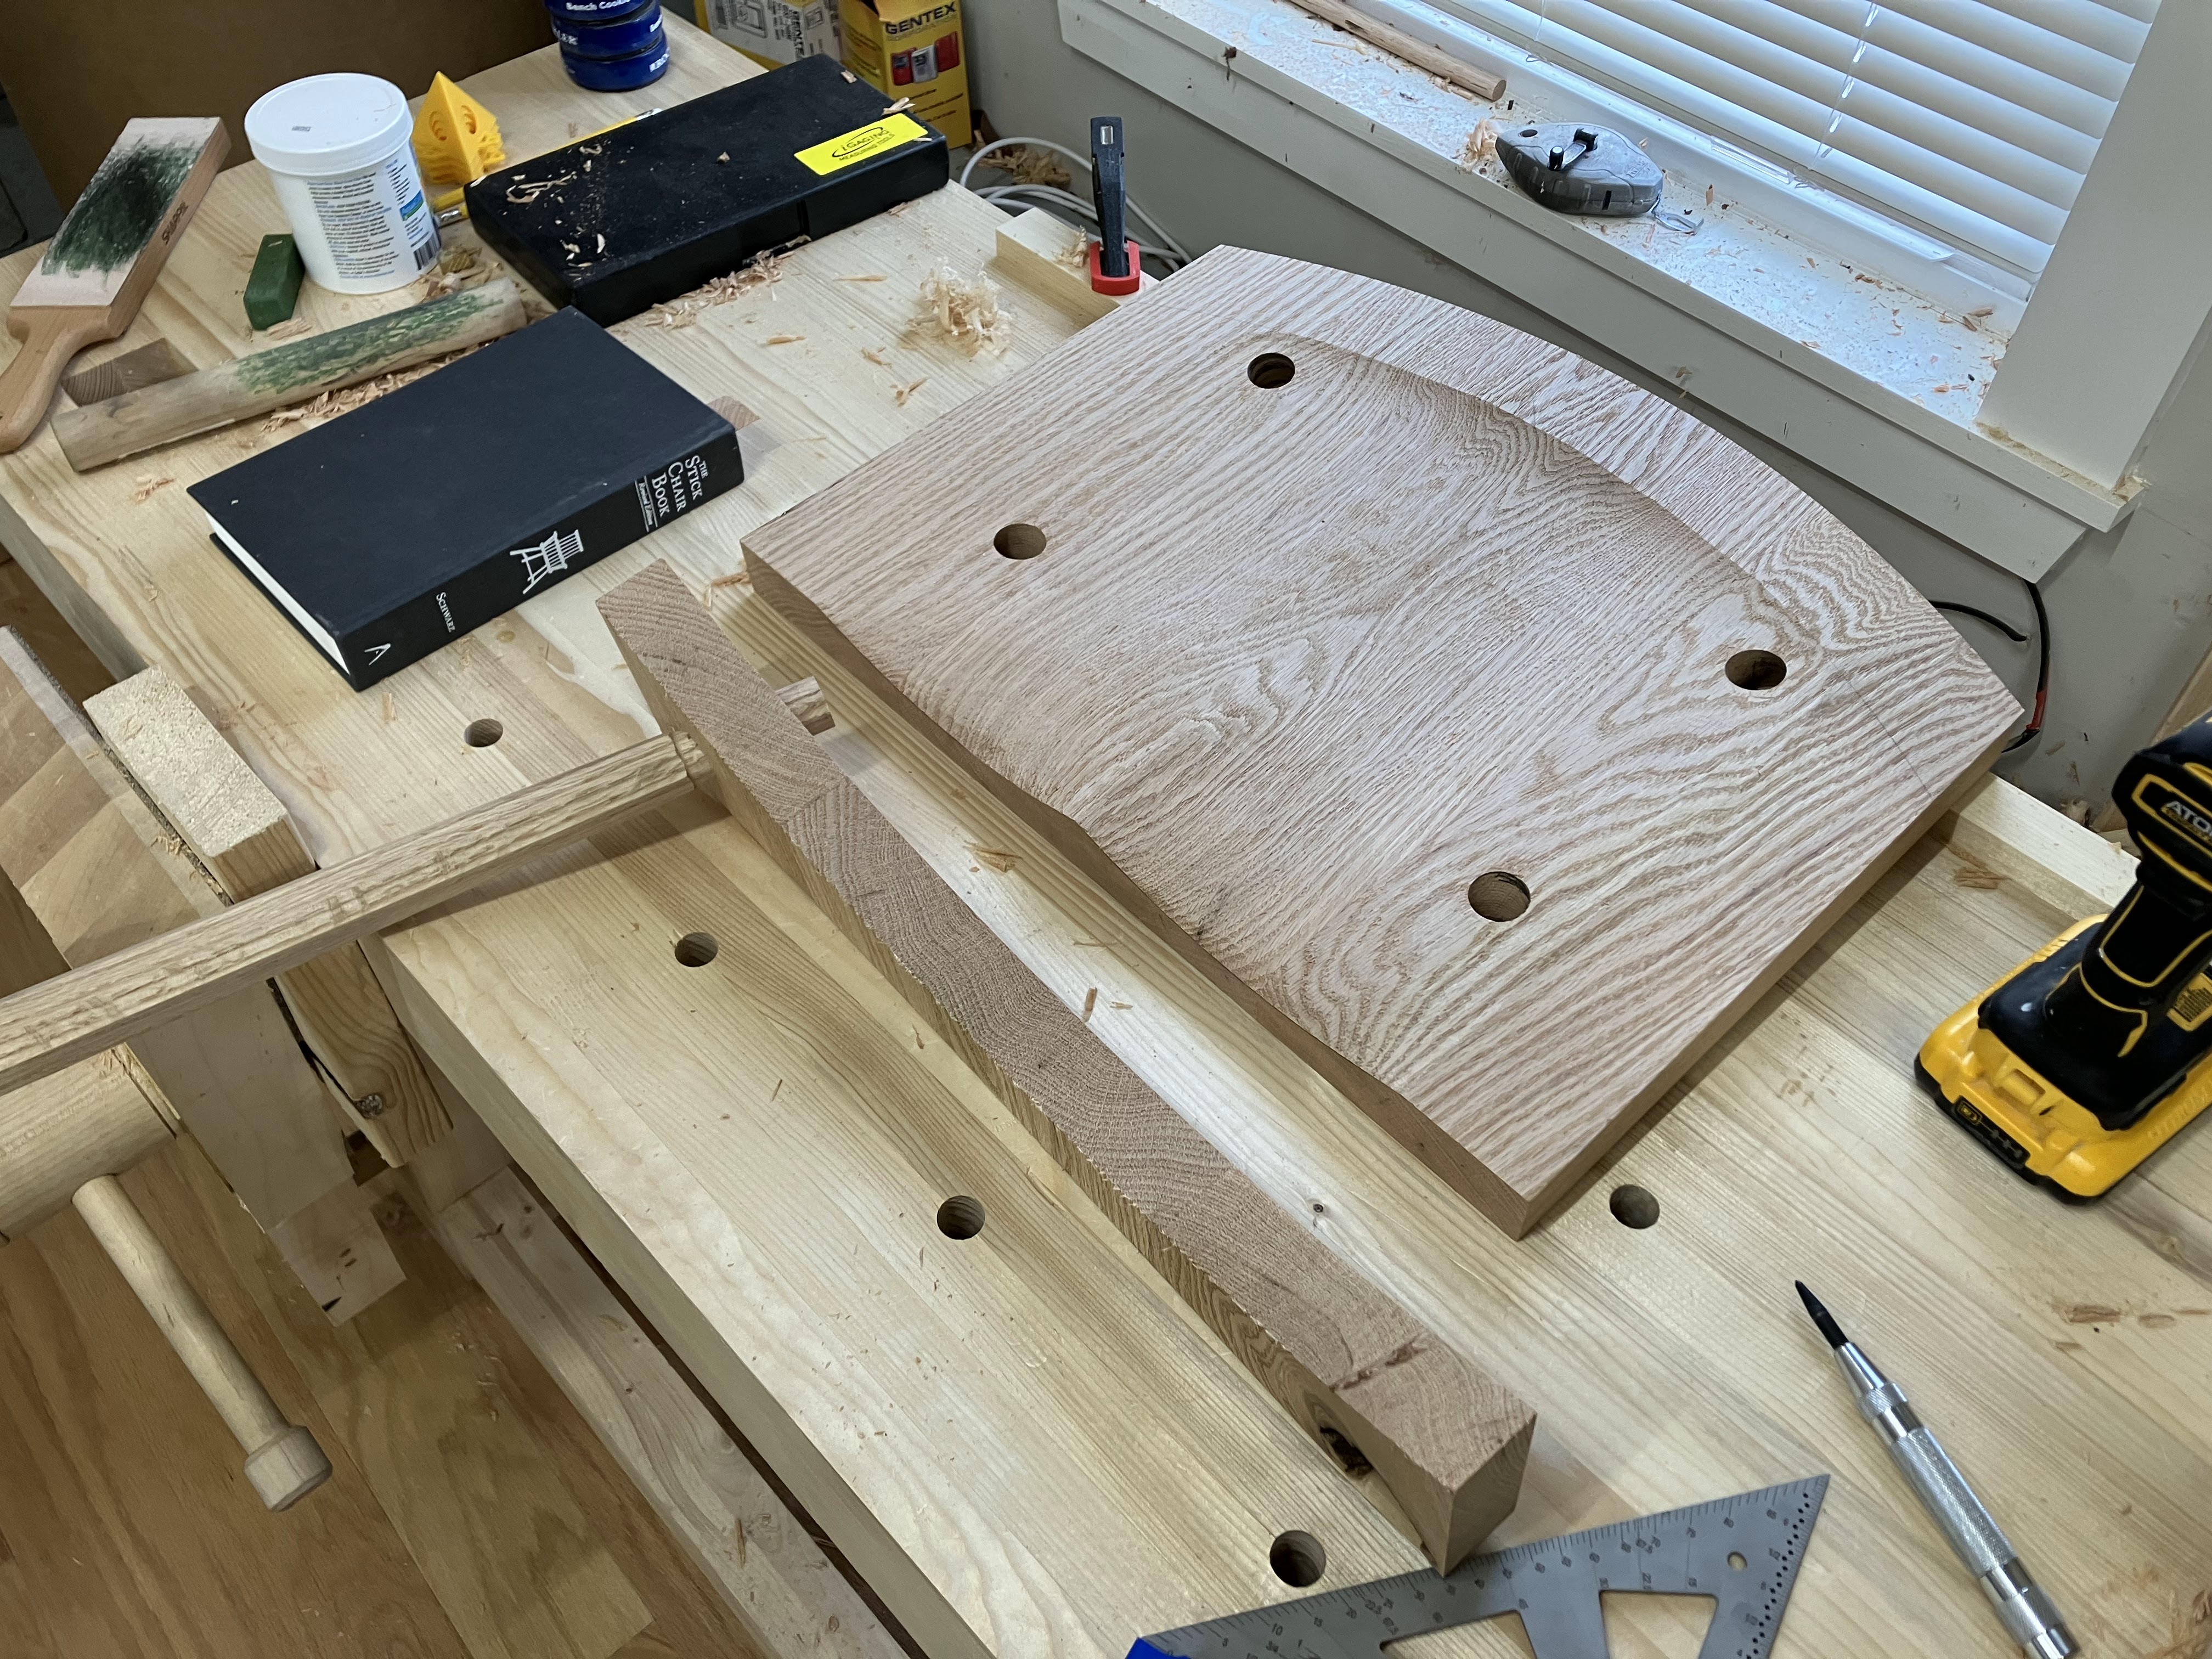
I scooped the seat out before cutting it to its final shape so I could secure it with a holdfast and not worry about surface damage. I was able to get a nice surface with the scorp and a scraper, and I didn’t end up using the travisher much. Since the seat was thin to begin with, I made the bowl fairly shallow—about 1/2″. Once I was done shaping the seat, I sliced the excess off of the back and used the offcut to make a test mortise for the tenons.
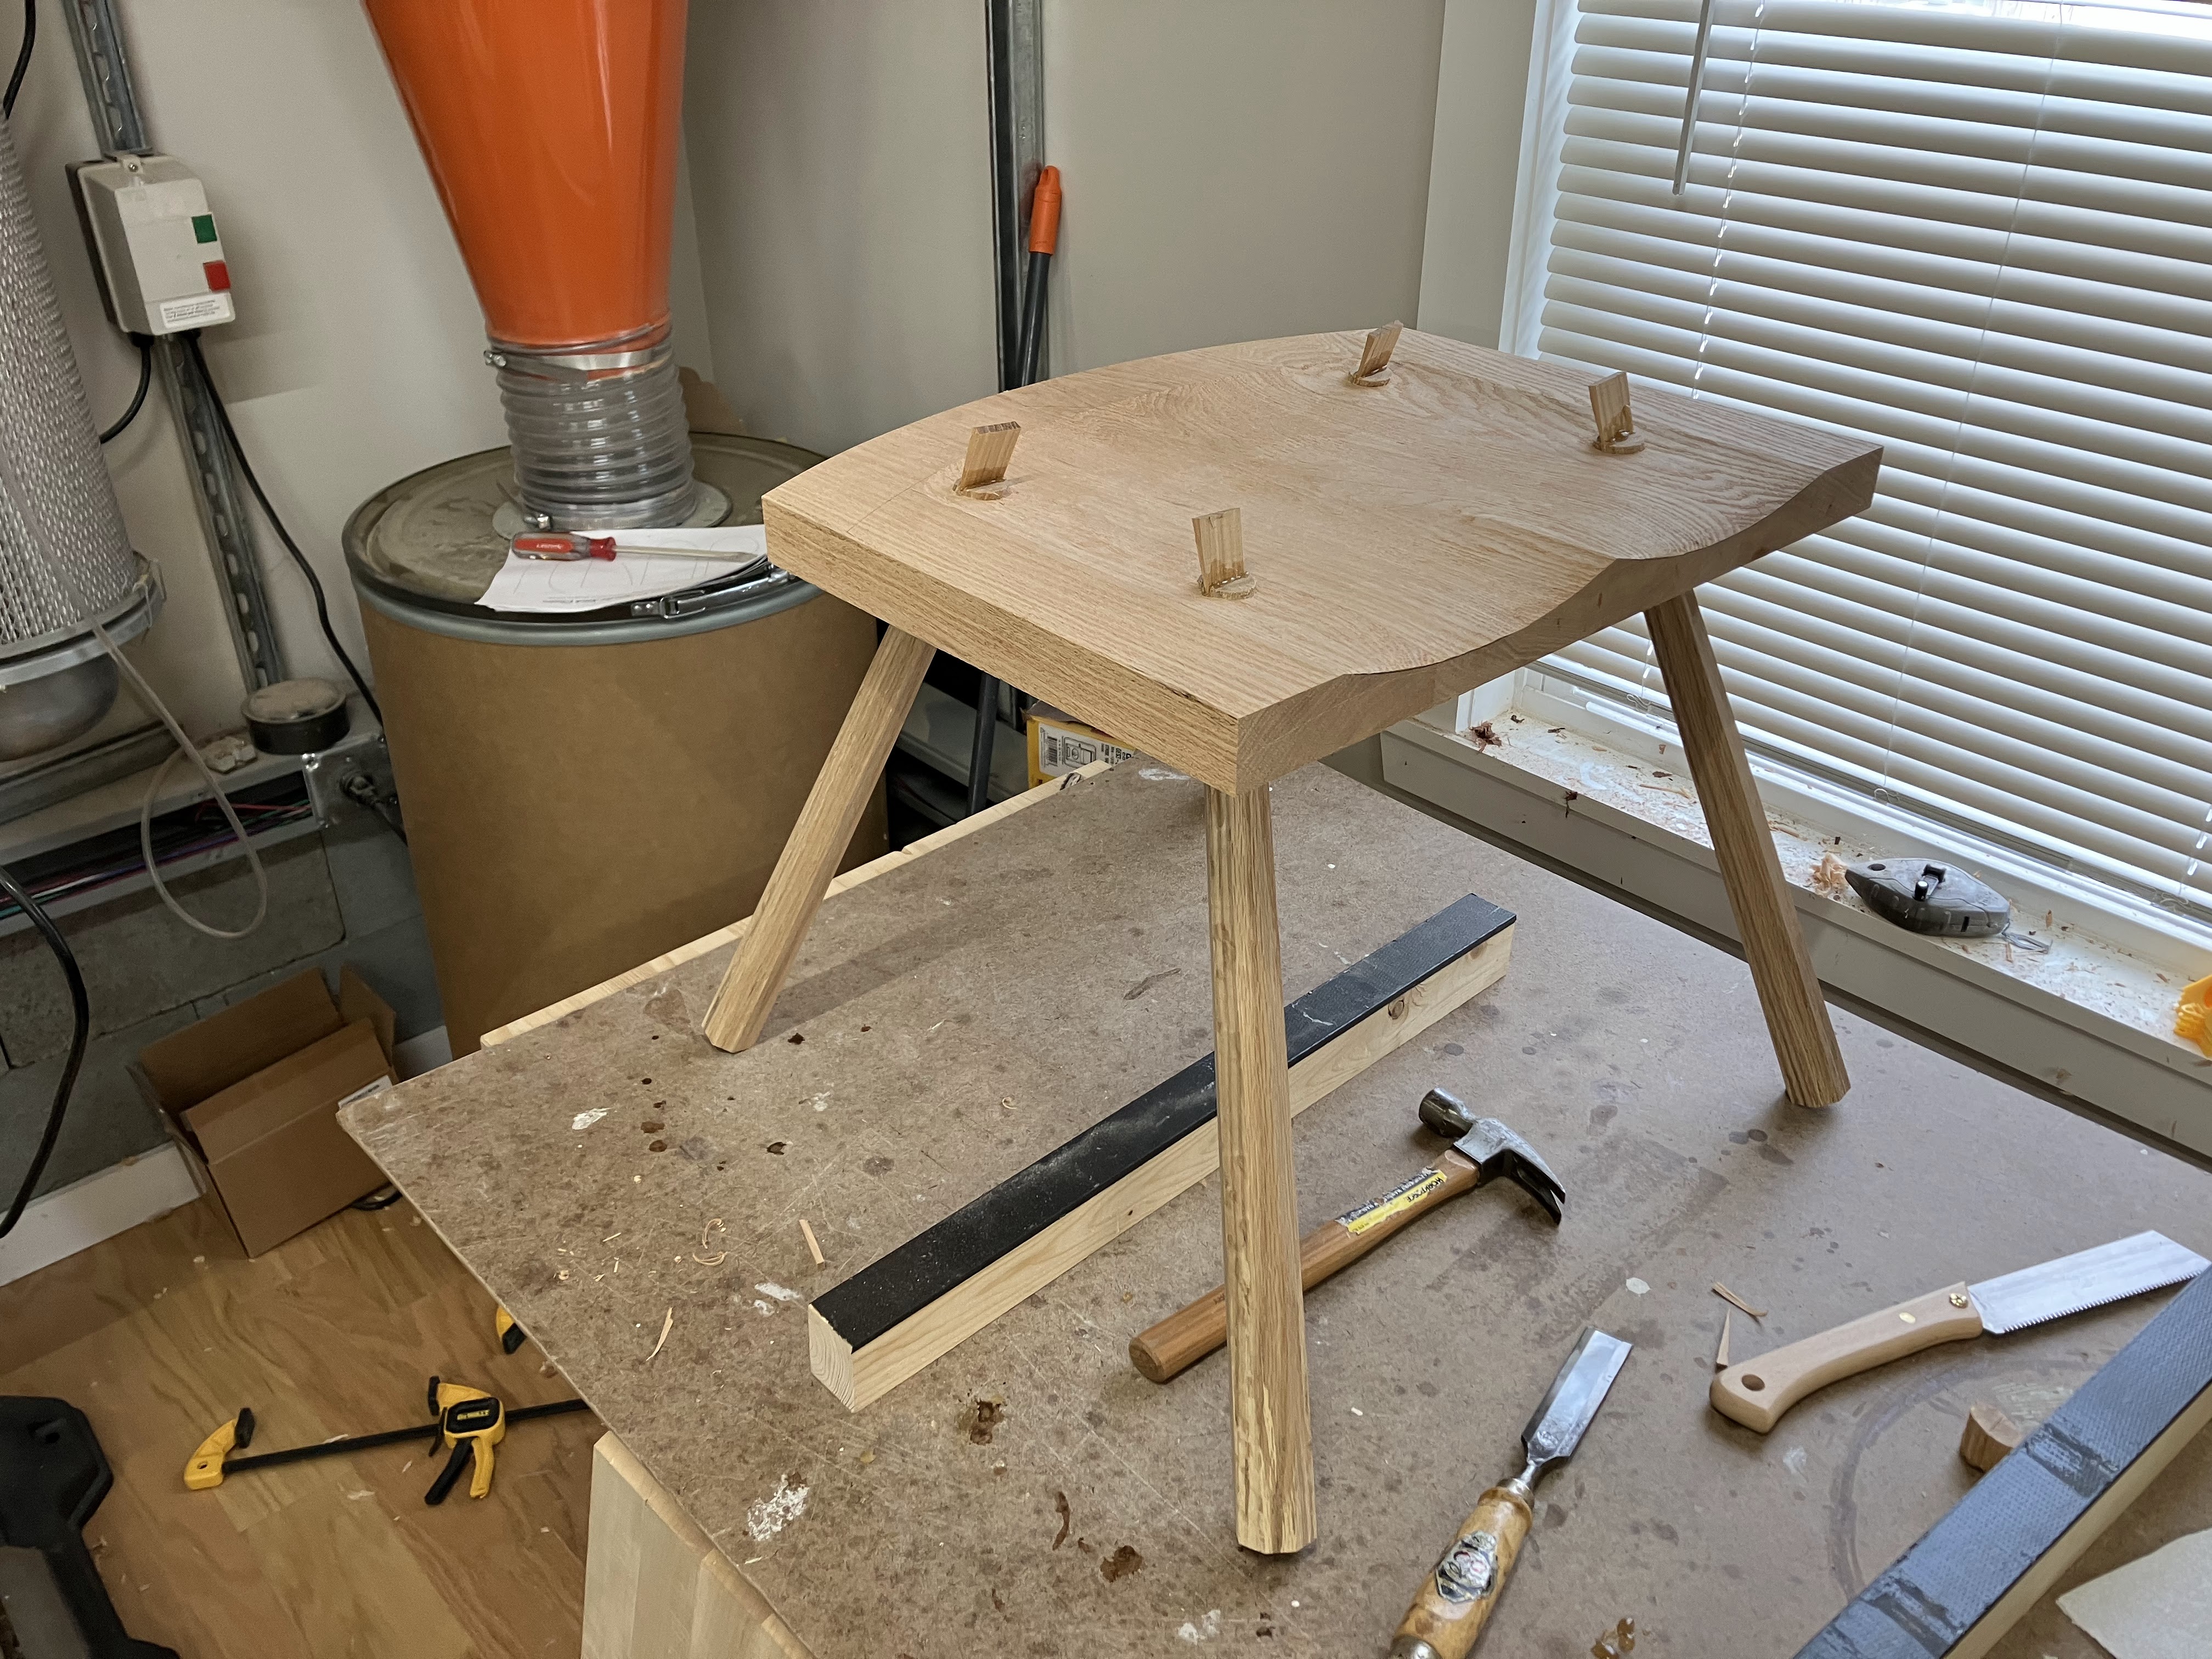
When the legs come out of the kiln, you have to move fast and assemble the base immediately. The point of the kiln is to shrink the part before you cut the tenon, so that when it returns to equilibrium, the tenon will expand ever so slightly and lock itself in place.
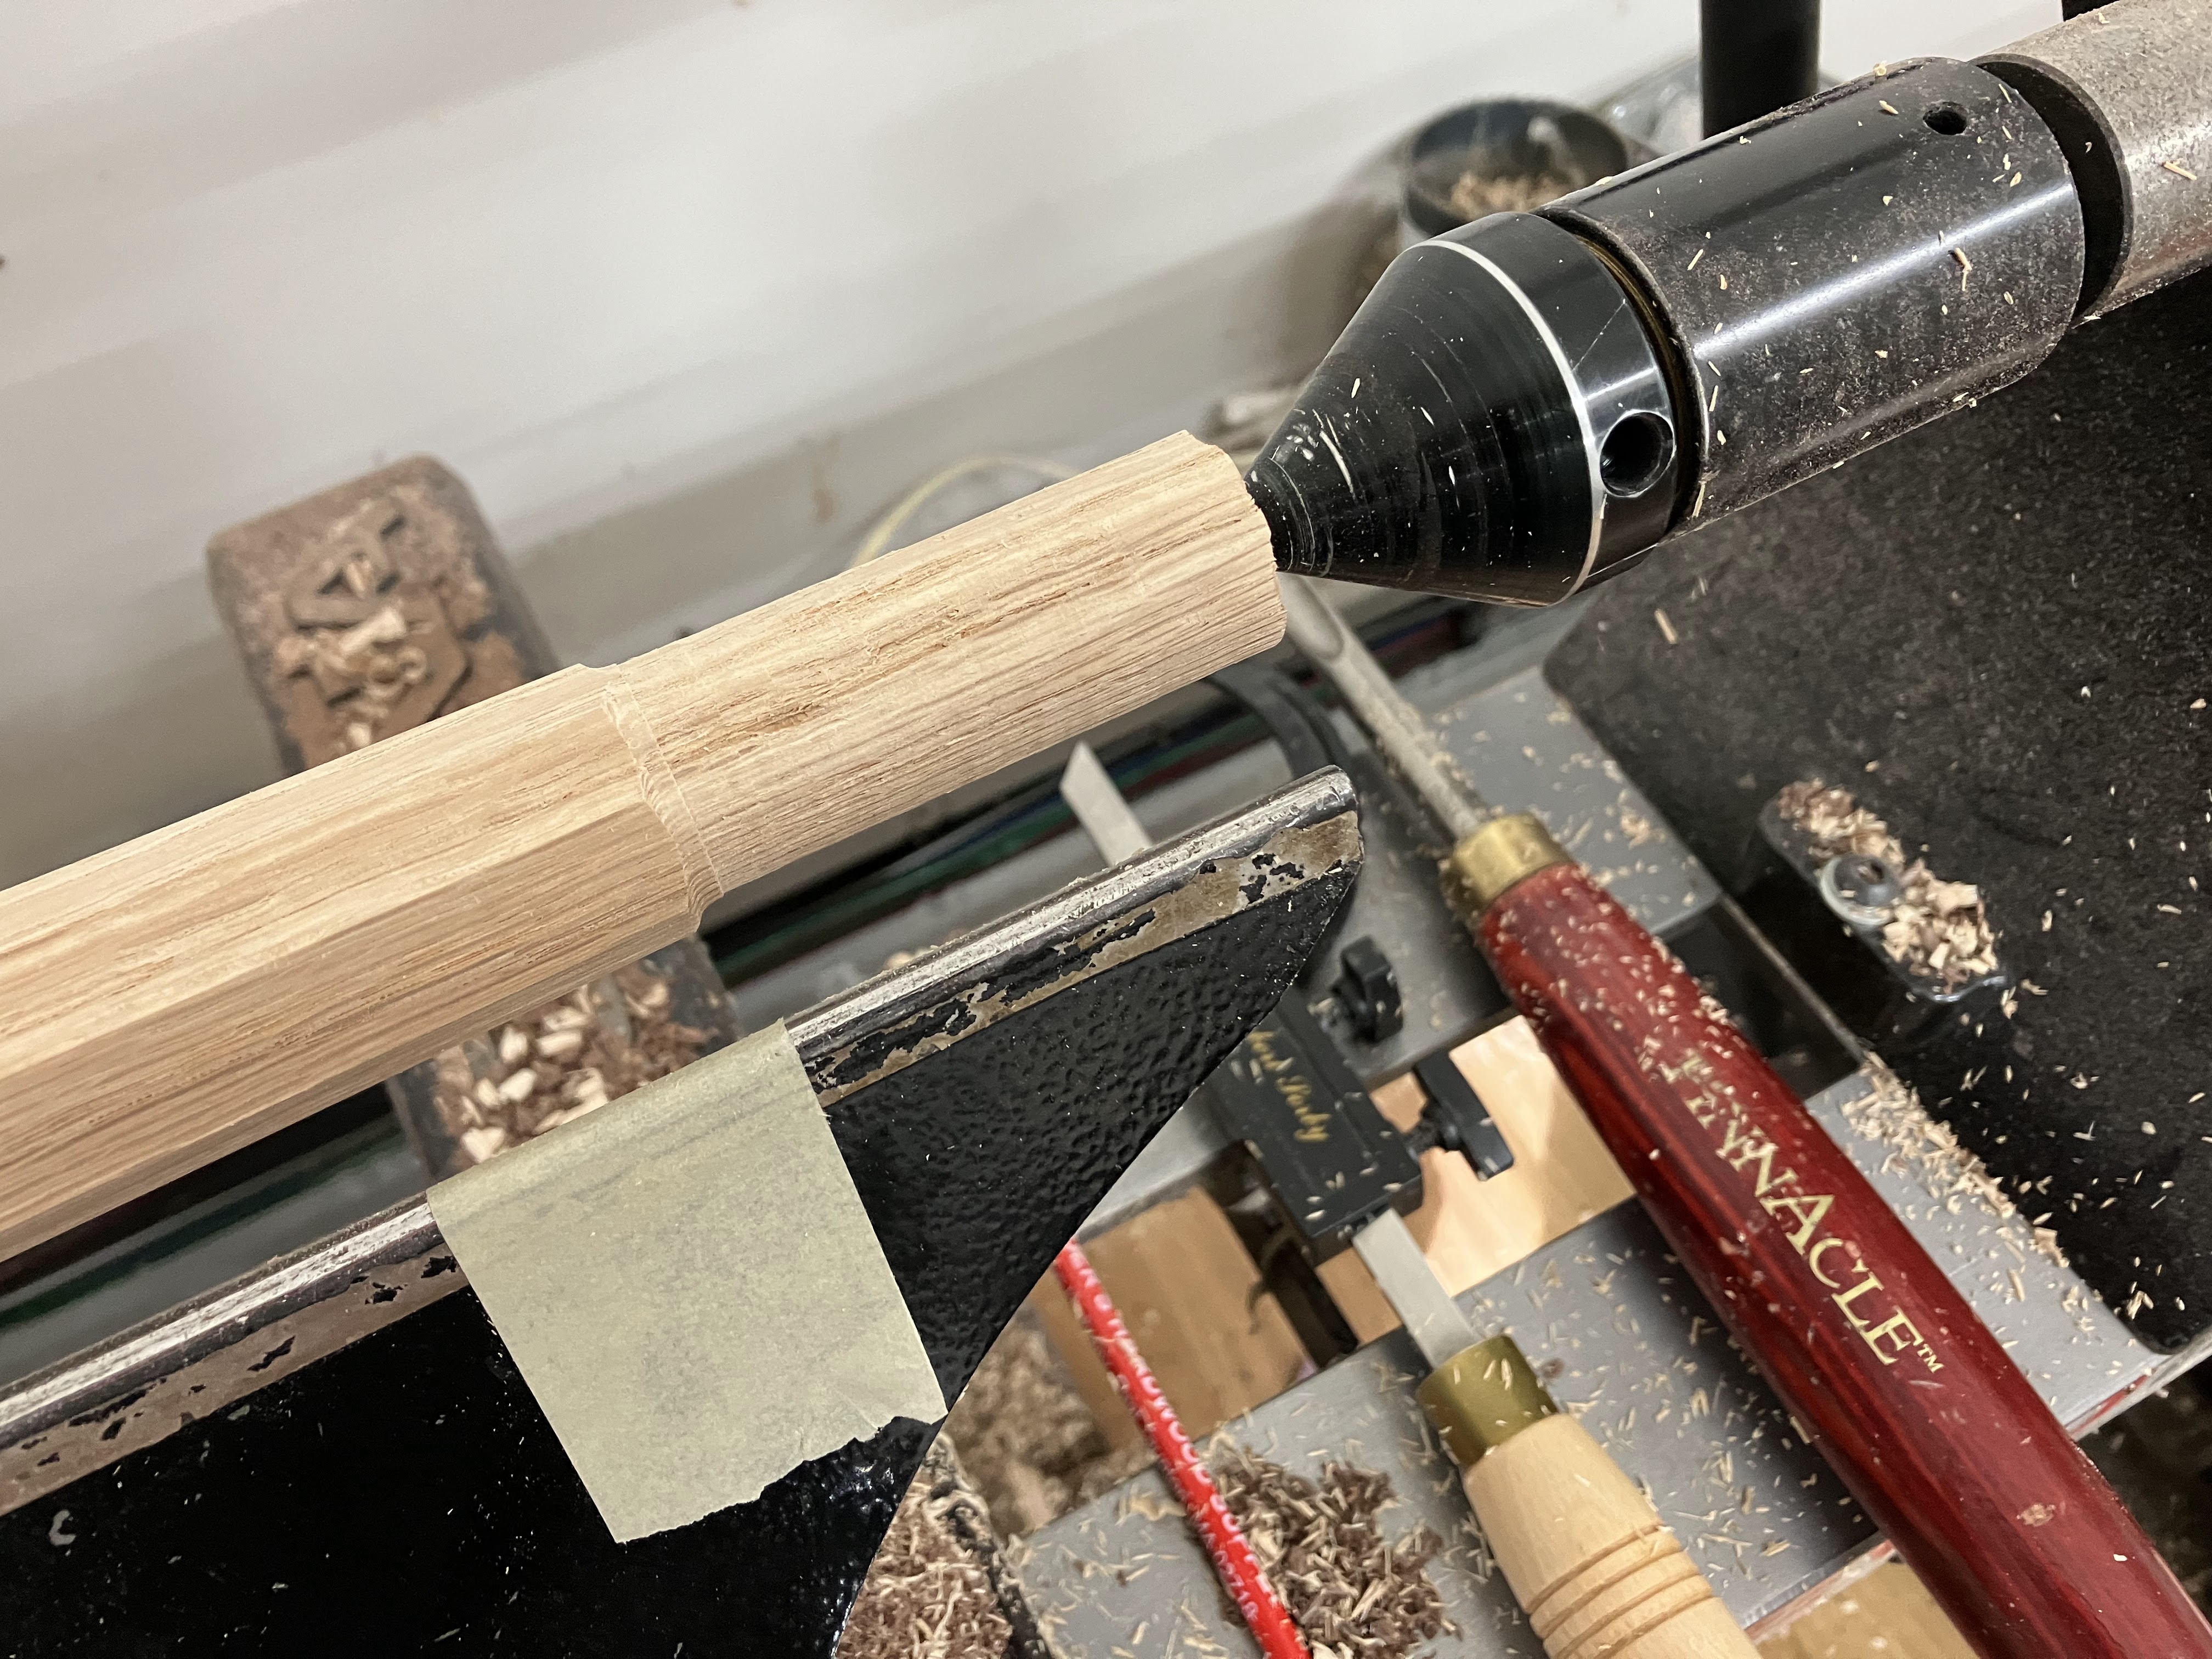
I’m personally a fan of turned, cylindrical tenons. Using a bedan sizing tool makes it quick and easy to produce consistent tenons. I always do a test, but in my experience, setting the sizing tool with calipers to match the diameter of the mortise works really well. I also like the look of the cove to transition from the tapered octagon to the tenon.
After turning the mortises, I took a final swipe down each facet with a block plane to leave a finished surface.
Now it’s time for assembly.
This time, I used hide glue. Which was an experience. I probably should have done a few tests before using it in a live glue up like this, but oh well. It set up extremely fast. I found it easier to dunk the tenon in the glue pot and quickly brush off the excess rather than trying to brush it on the tenon. Cleanup was much easier, though, so that’s a plus.
The hickory wedges worked like a dream. I hammered away and none of them seemed remotely close to snapping. Unless I need to use another species for a decorative element, I’m not sure why I would use anything else.
It’s been, more or less, smooth sailing so far. Aside from the shapes being a bit different, this isn’t anything I haven’t done before. With the base is complete, I’m moving into uncharted territory. I’m both excited and a bit apprehensive to add the armrests because one mistake could ruin the chair. But there’s nowhere to go but forward.

Leave a comment