
When my daughter was born, I had the idea to build chairs for her as she grows. Someday, this may leave her with a burdensome amount of chairs but that is her problem, not mine.
I finished the first one for her first birthday. She doesn’t know how to sit in it yet, but she does like to play with it.
The design was inspired by the Lowback Stick Chair in The Stick Chair Book. It may shock you to hear this, but my one-year-old wasn’t super enthusiastic about my attempts to measure her for chair dimensions. I paired my rough measurements with some I found from other children’s chairs online.

The seat is a half-scale of the plans in the book, making laying out the legs and spindles incredibly easy. Since children have long torsos relative to their legs, many children’s chairs end up looking squat. On this chair, the seat is 7 inches from the floor and the armrest is 5 5/8 inches from the seat. These are bizarre proportions for a chair, so I’m happy that the Lowback design translated so well.
I also incorporated some “Windsor” elements through the turned legs and posts. There wasn’t any particular inspiration behind this. Turning the legs was the easiest way to go, and I though the thicker post would add more stability to the upper assembly. I really like the look of the legs, although I’m not sure it would translate to a full-sized chair.
I painted the chair with General Finishes Basil Milk Paint. I’ve written about this paint in a prior post and I absolutely love it. This was my first time spraying it. I was very happy with the results, but I’ll save that for another post.
Aside from this being a children’s chair, I think painting it was appropriate for the same reason that many antique chairs were painted: it’s made from a mishmash of woods. Three different species and four different trees. The seat is catalpa, the turned elements are maple, the spindles are from the oak log that I split, and the armbow is from an oak beam I got from my in-laws.
The build was fairly straightforward, but I did try a few techniques that were new to me and worked well.
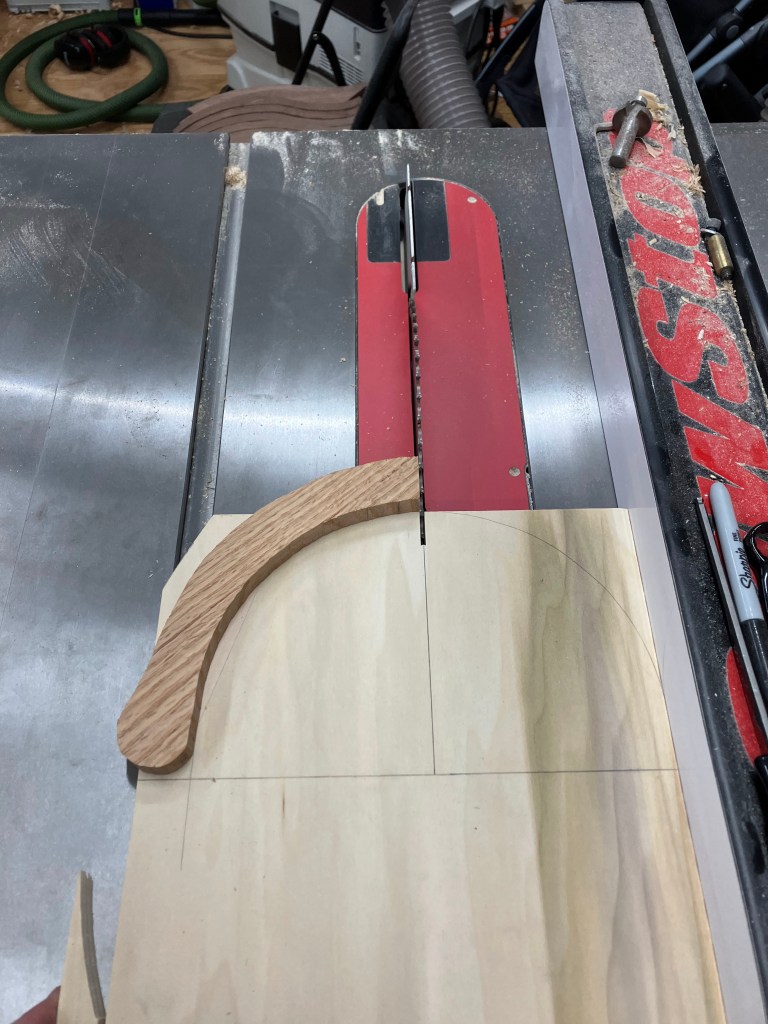
The three-piece armbow is fairly typical. I cut the arms as carefully as I could, but I still needed to “joint” them afterward. The inside of the arms follows the seat’s curve, so I traced the seat on a piece of plywood and used double-sided tape to hold the arms while I jointed them on the tablesaw.
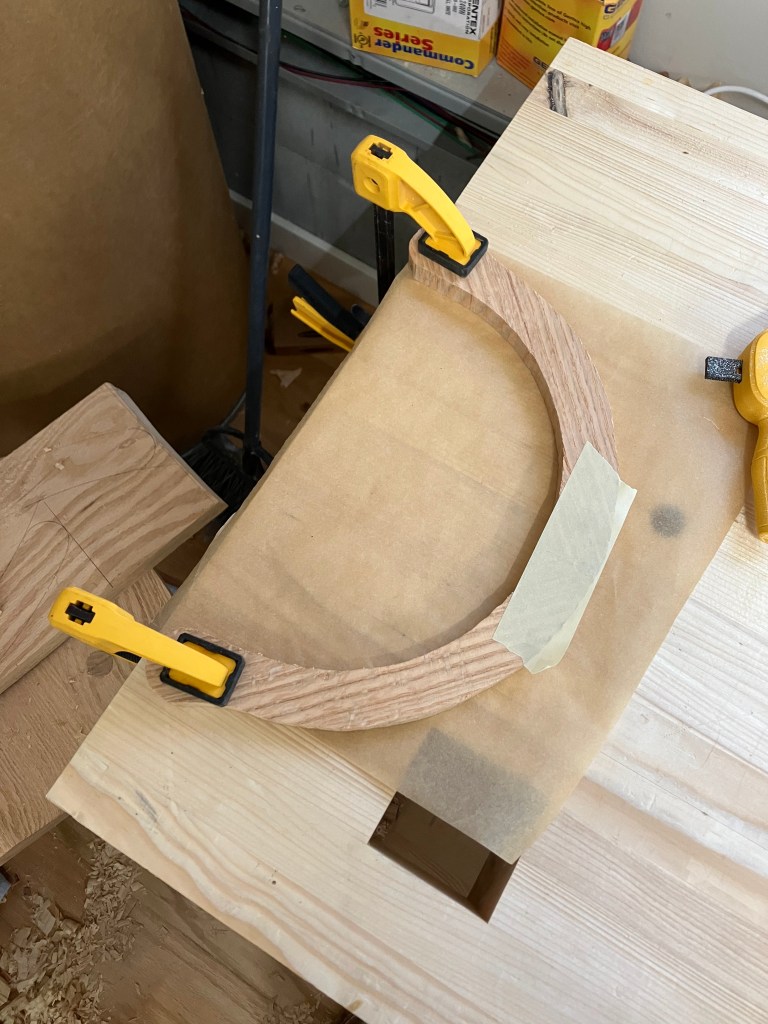
Because of the small size, I didn’t have a great way to apply clamping pressure while gluing. I used a combination of tape and clamps to hold the pieces in place while the glue dried. This isn’t a very critical glue joint, it just needs to survive drilling the mortises. Most of the strength comes from gluing on the third piece of the armbow.
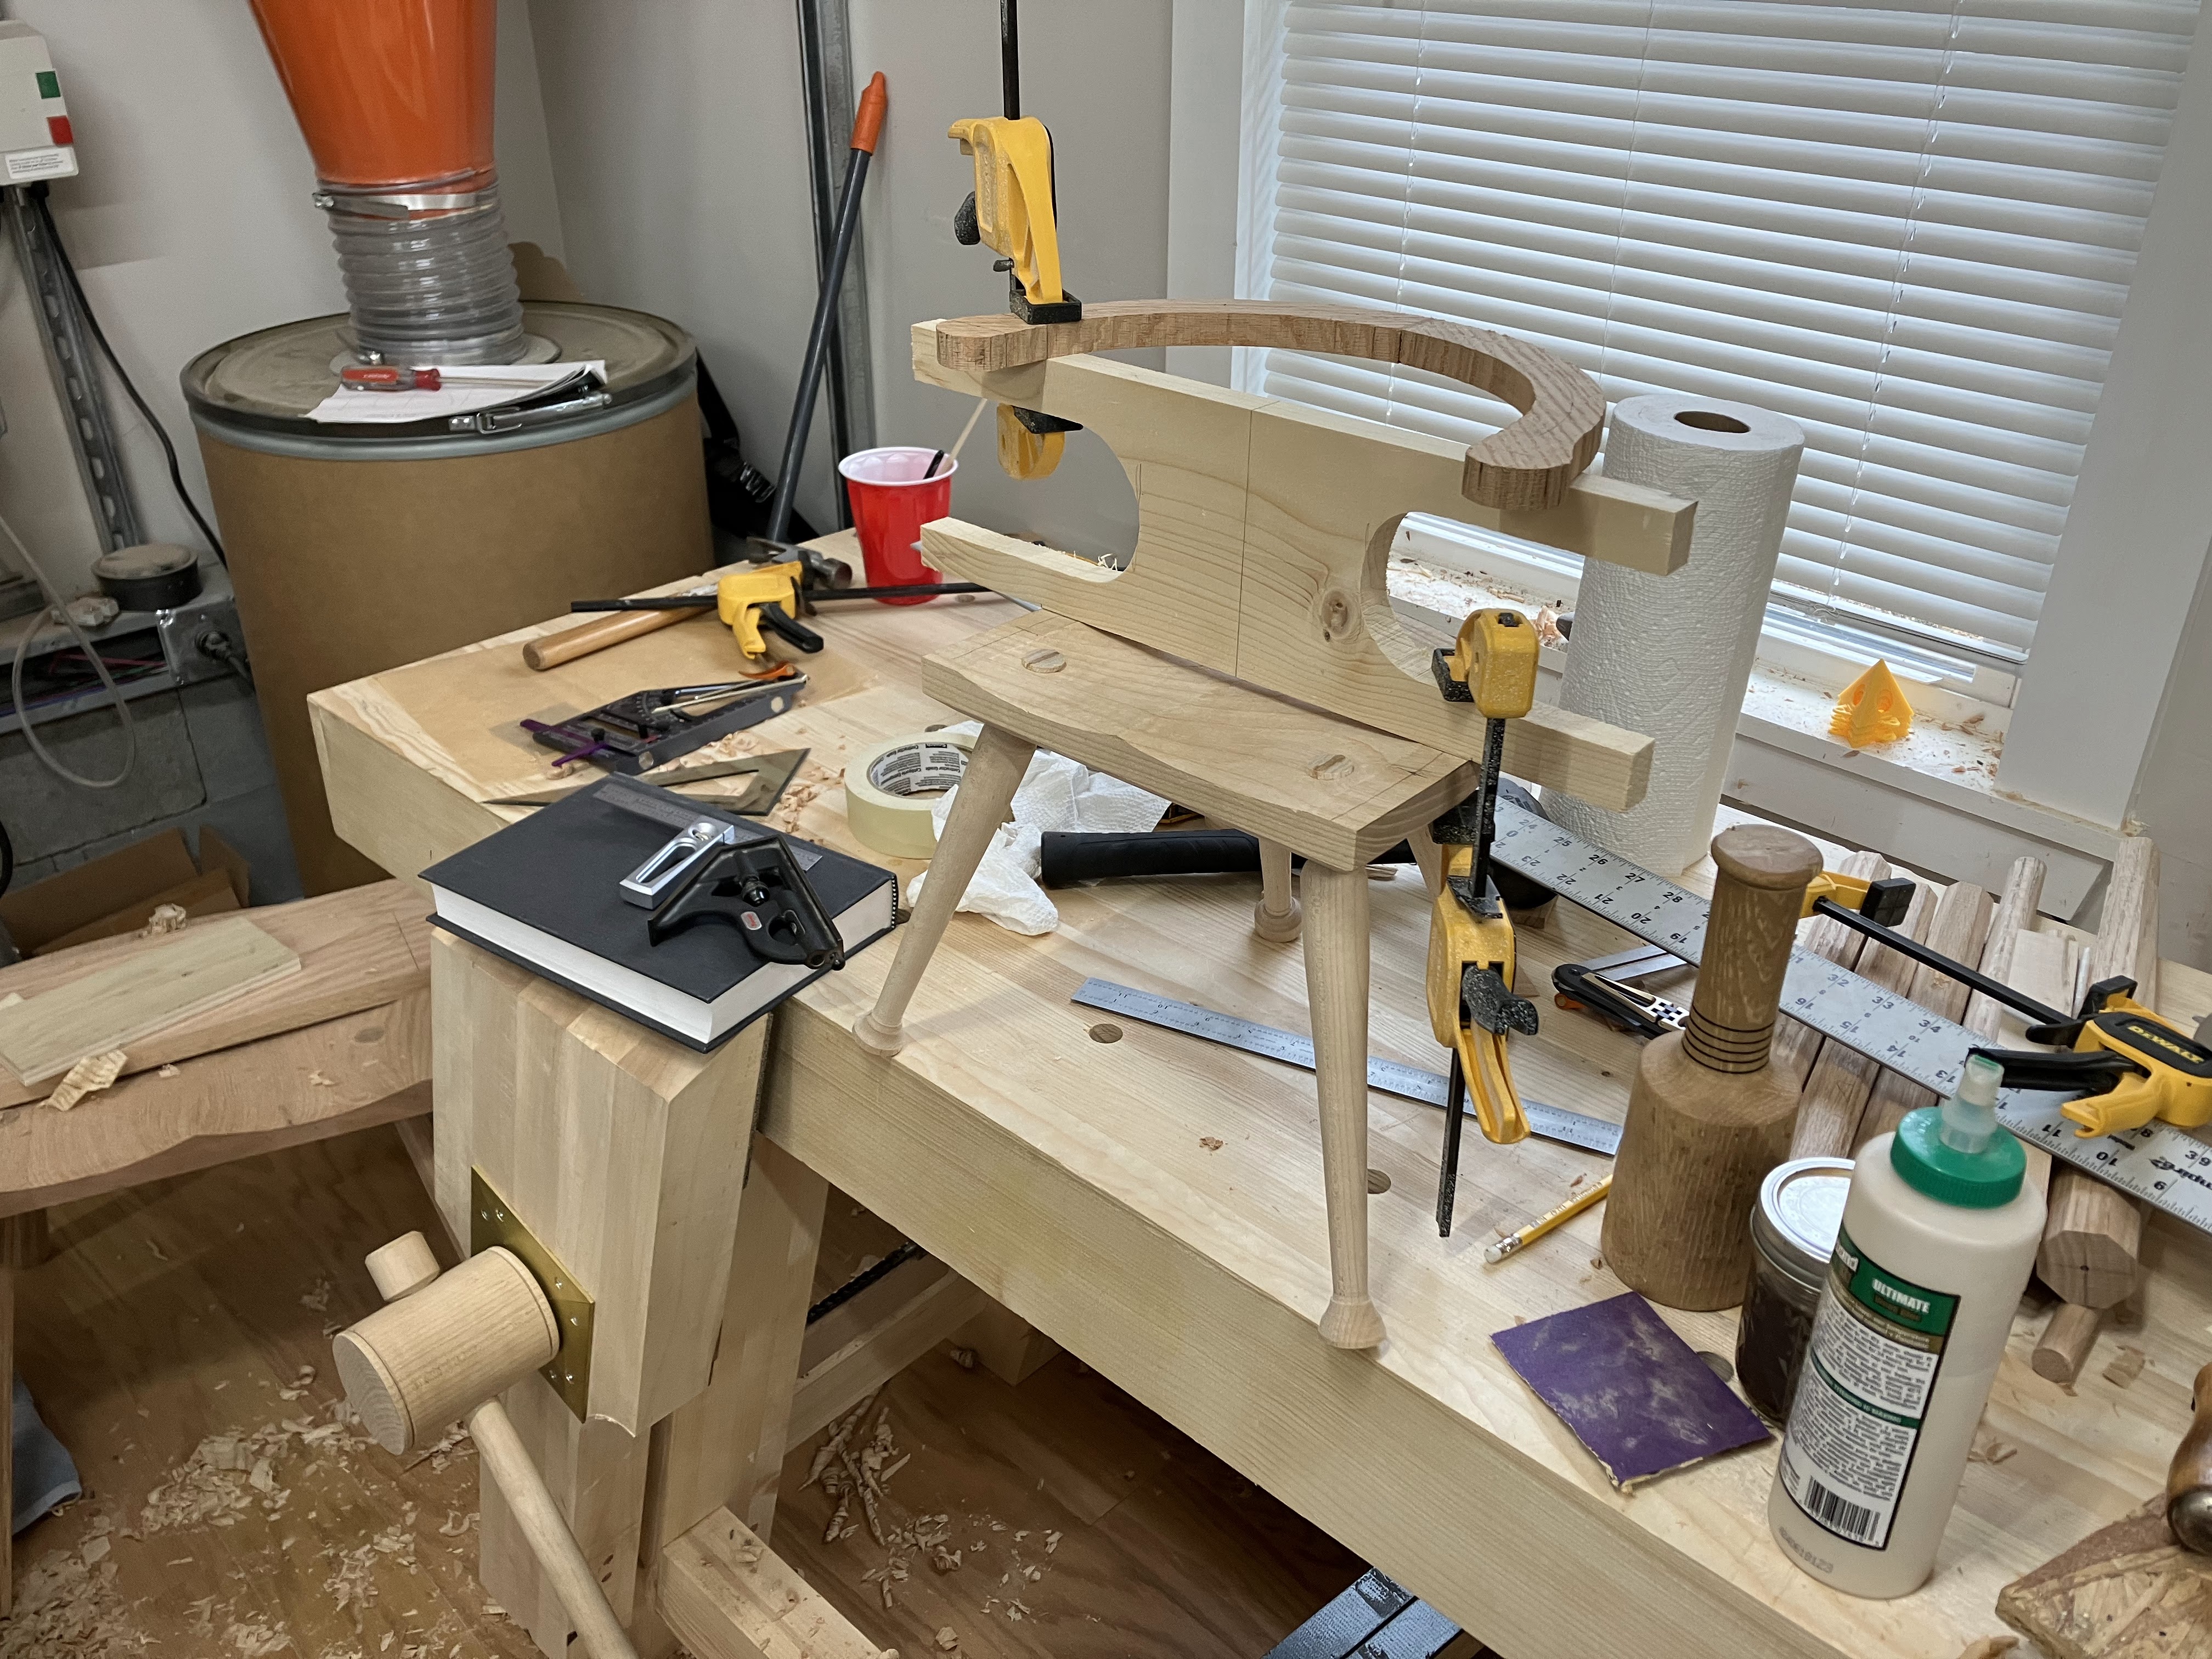
This was my first chair with an upper assembly. I used a jig from The Stick Chair Book to drill the mortises. I think that the chair’s small size made this easier than it would be on a full-sized chair. I used a bevel gauge to help with the angle, but mostly eyeballed the mortises in the armbow. Once those were done, it was straightforward to drill the seat mortises using the holes in the armbow as a guide.
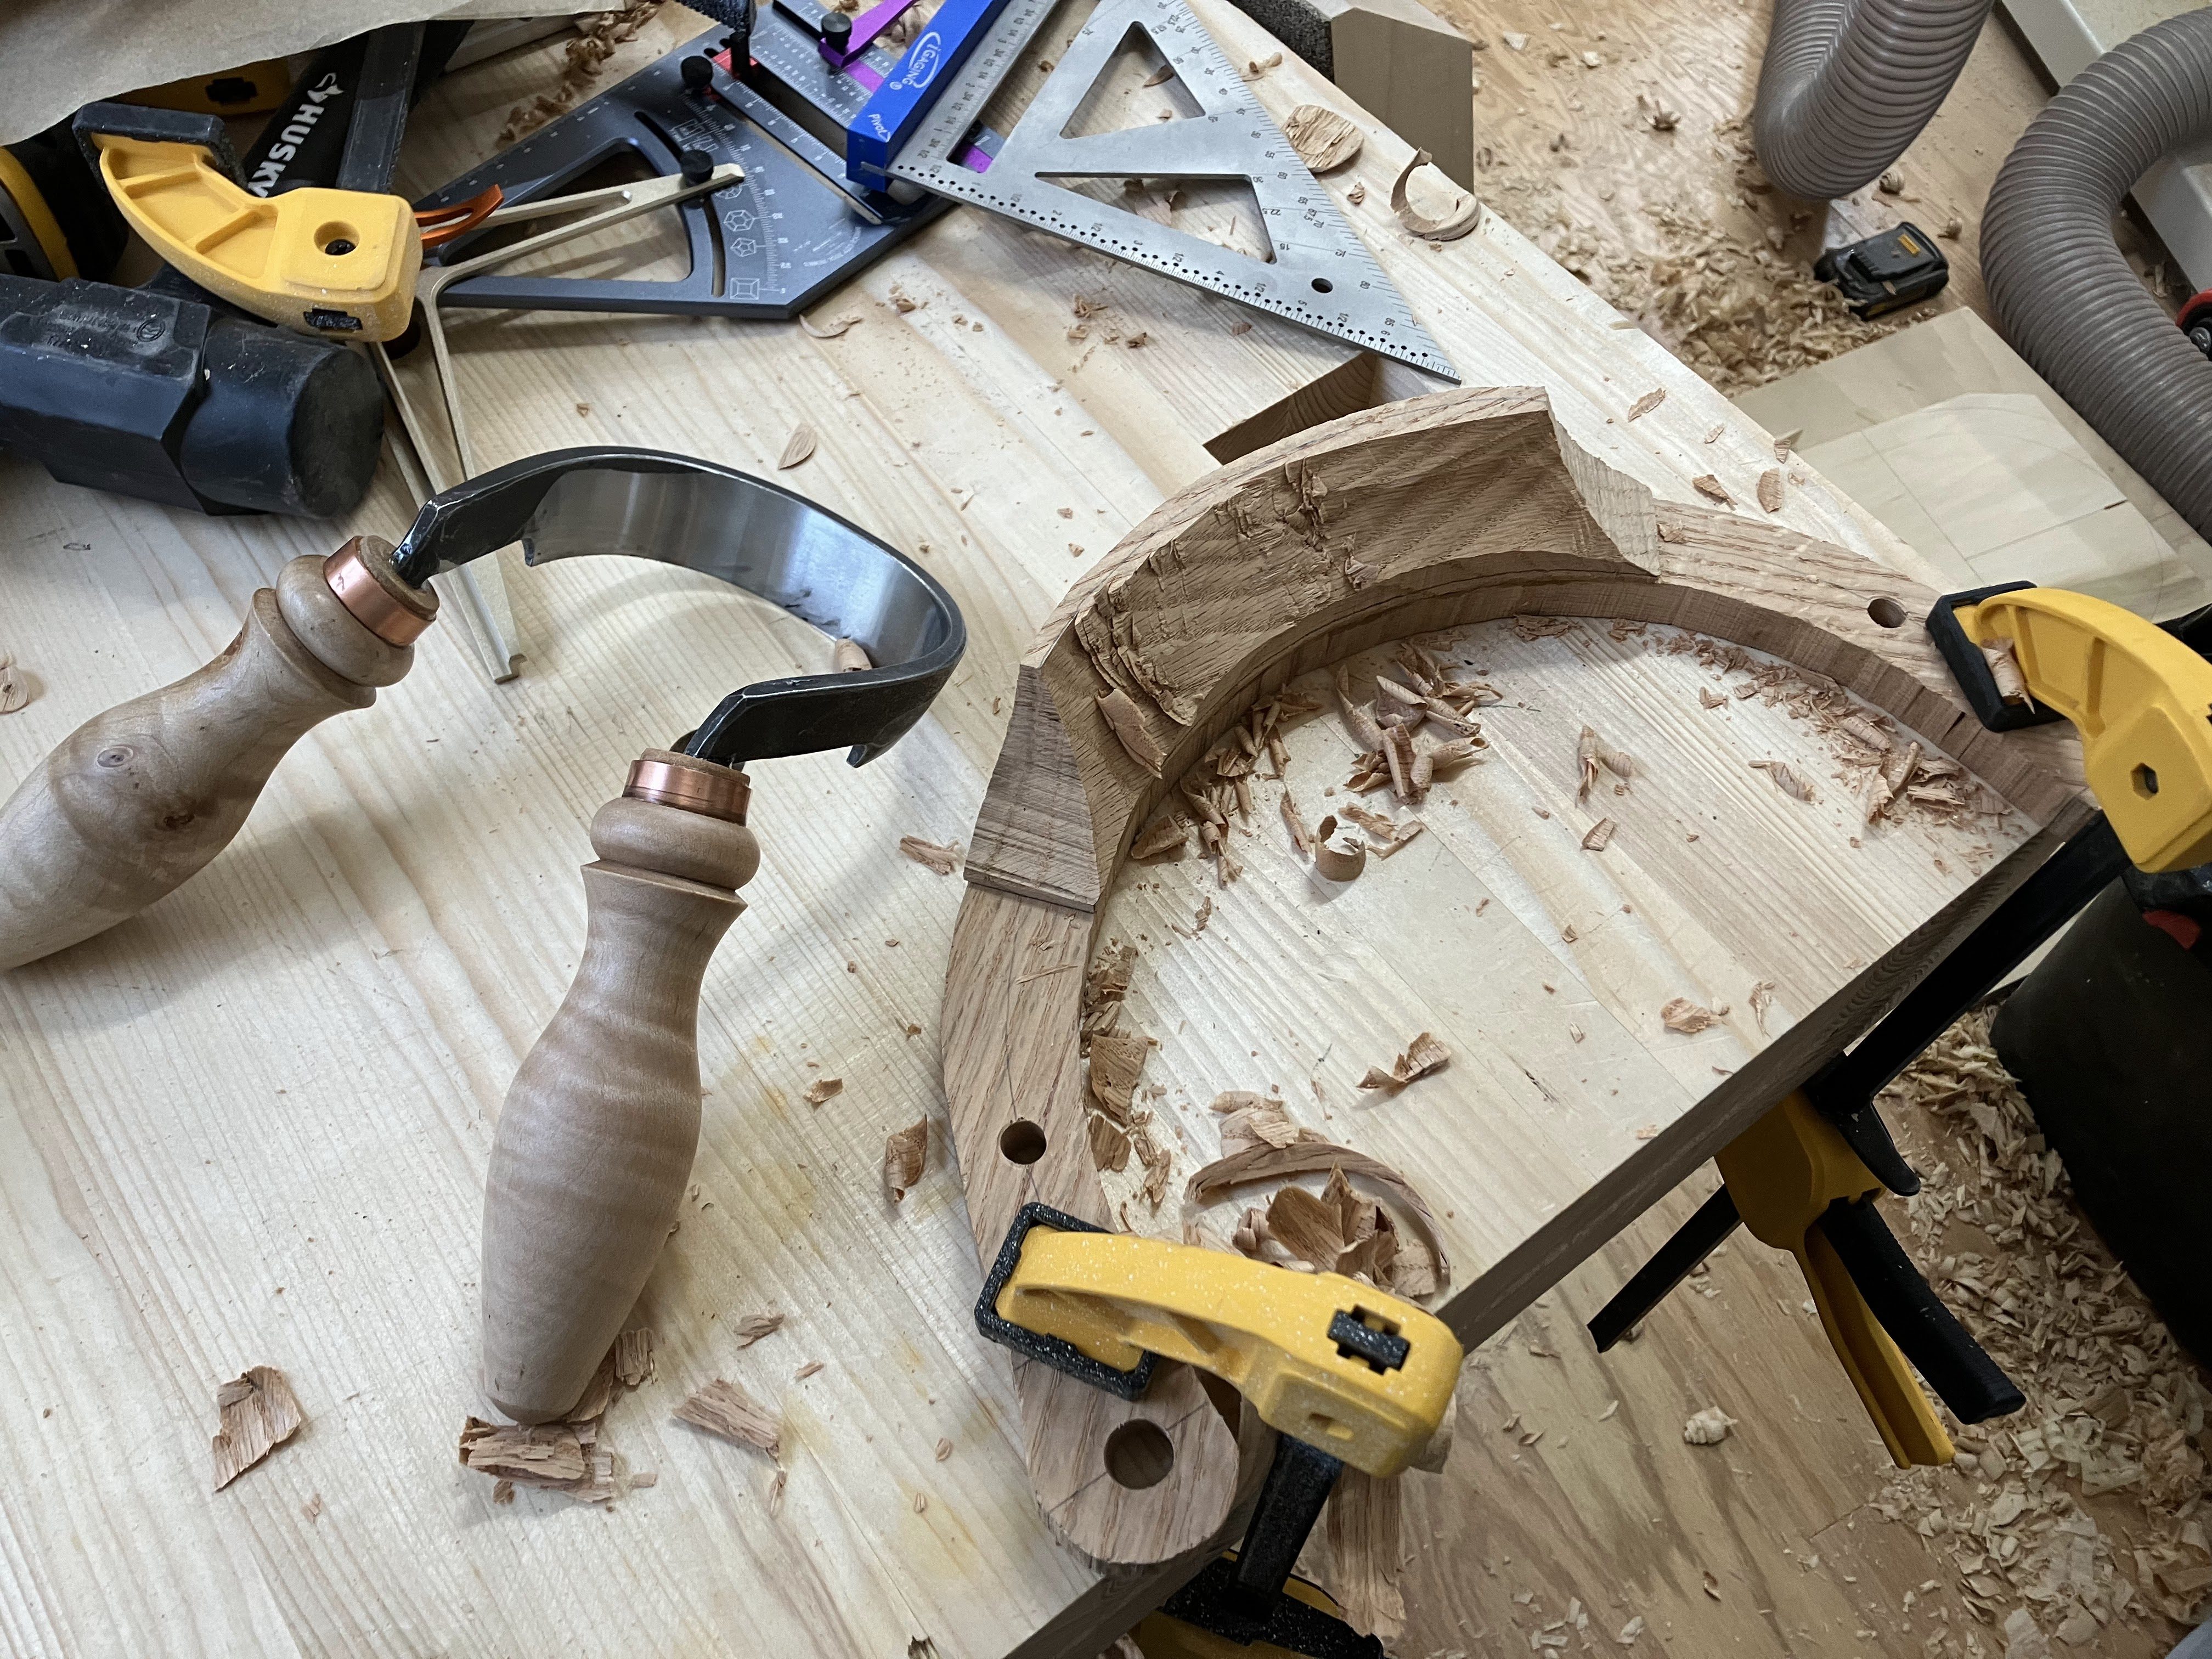
After all the mortises were drilled, I glued on the top piece onto the armbow. I used a scorp to shape the concave section. In the book, Chris uses a bandsaw to rough out the angle, but I thought tilting the table would be more work than just hogging off the material by hand. With the benefit of hindsight, tilting the bandsaw table probably would have been easier. I did get a good workout, though.
I’m happy with how the chair came together. It gives me some more confidence to tackle the upper assembly on the Irish Stick Chair. I had hoped to have that chair finished by now, but I’ve been busy with plant stands and some other finishing work. I should have a couple of posts put together on those topics in the coming weeks.

Leave a comment